
Happy Sunday, all! I hope everyone’s having a great summer so far. Mine has been filled with lots of fun celebrations! This last Friday, I celebrated my 31st birthday. Before that, it was the Canada Day long weekend, which happens to coincide with my mom’s birthday. And the week before that, Tania and I hosted our long-awaited engagement party!
Ever since Tania and I got engaged, we knew we wanted to host a party to celebrate with all our family and friends. We also knew we wanted to host it at home – restaurant rentals are convenient but costly, and weddings are expensive enough, so we wanted to go the most affordable route! But since we got engaged late last August, we just didn’t have enough time to pull together a big backyard party before the weather got too chilly. So we decided to postpone to this June, and I’m happy to say it was worth the wait – we had such a wonderful day! (Check out the highlight reel here.) Our guest count was around 100, so to make it more manageable, we split the day into two time windows: we had family come from 12-4 and friends from 5pm onwards, with a 1-hour break in between to tidy up, refresh the food, and take a breather before the next group came.
Last year after my 30th birthday, I wrote this post sharing my best tips for hosting a larger group. Well, that party was only 30 people, and let me tell you – as much as I love hosting, the thought of hosting a crowd of ~100 can seem downright daunting and overwhelming – it gave me tons of anxiety! So today, I thought I’d share my best tips for hosting a really large group. I learned a lot throughout the planning process, and I’m excited to share my best advice for how to do things in the most organized, affordable and stress-free way possible. I’ll start by sharing what we did for food and decor, and then I’ll share a list of my best planning/hosting tips – I hope they’re helpful to anyone planning to host a large party of their own!
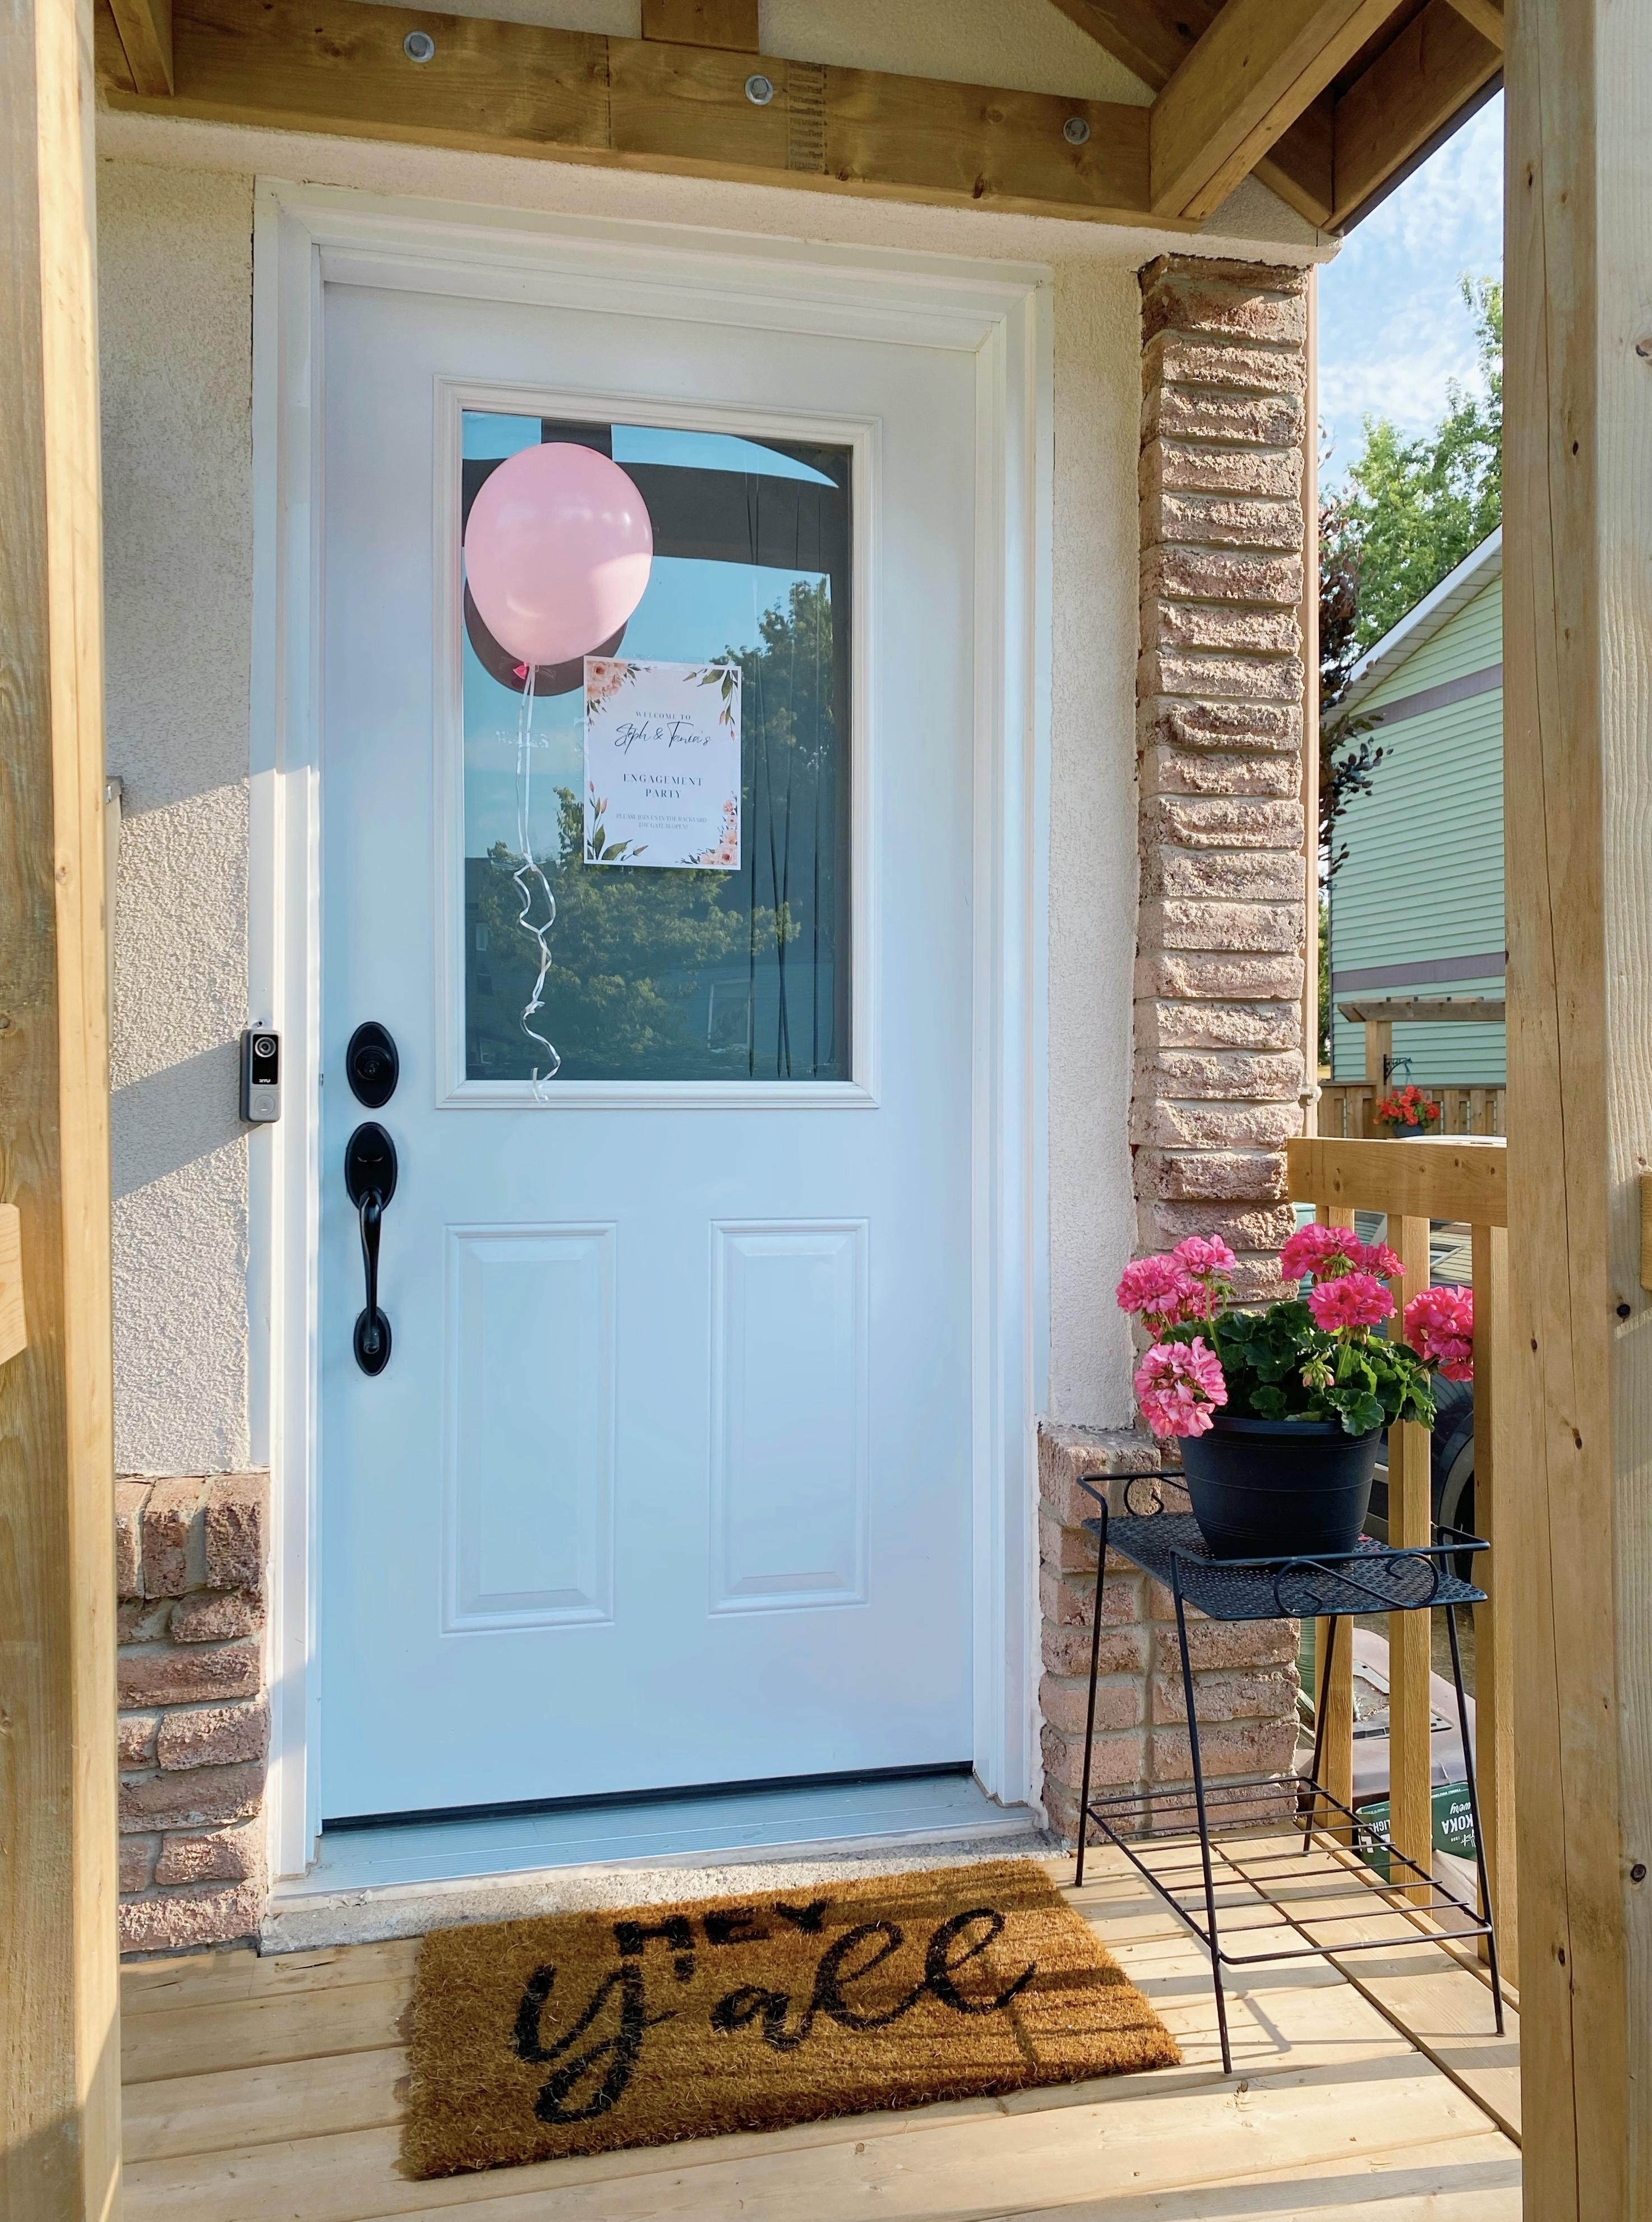
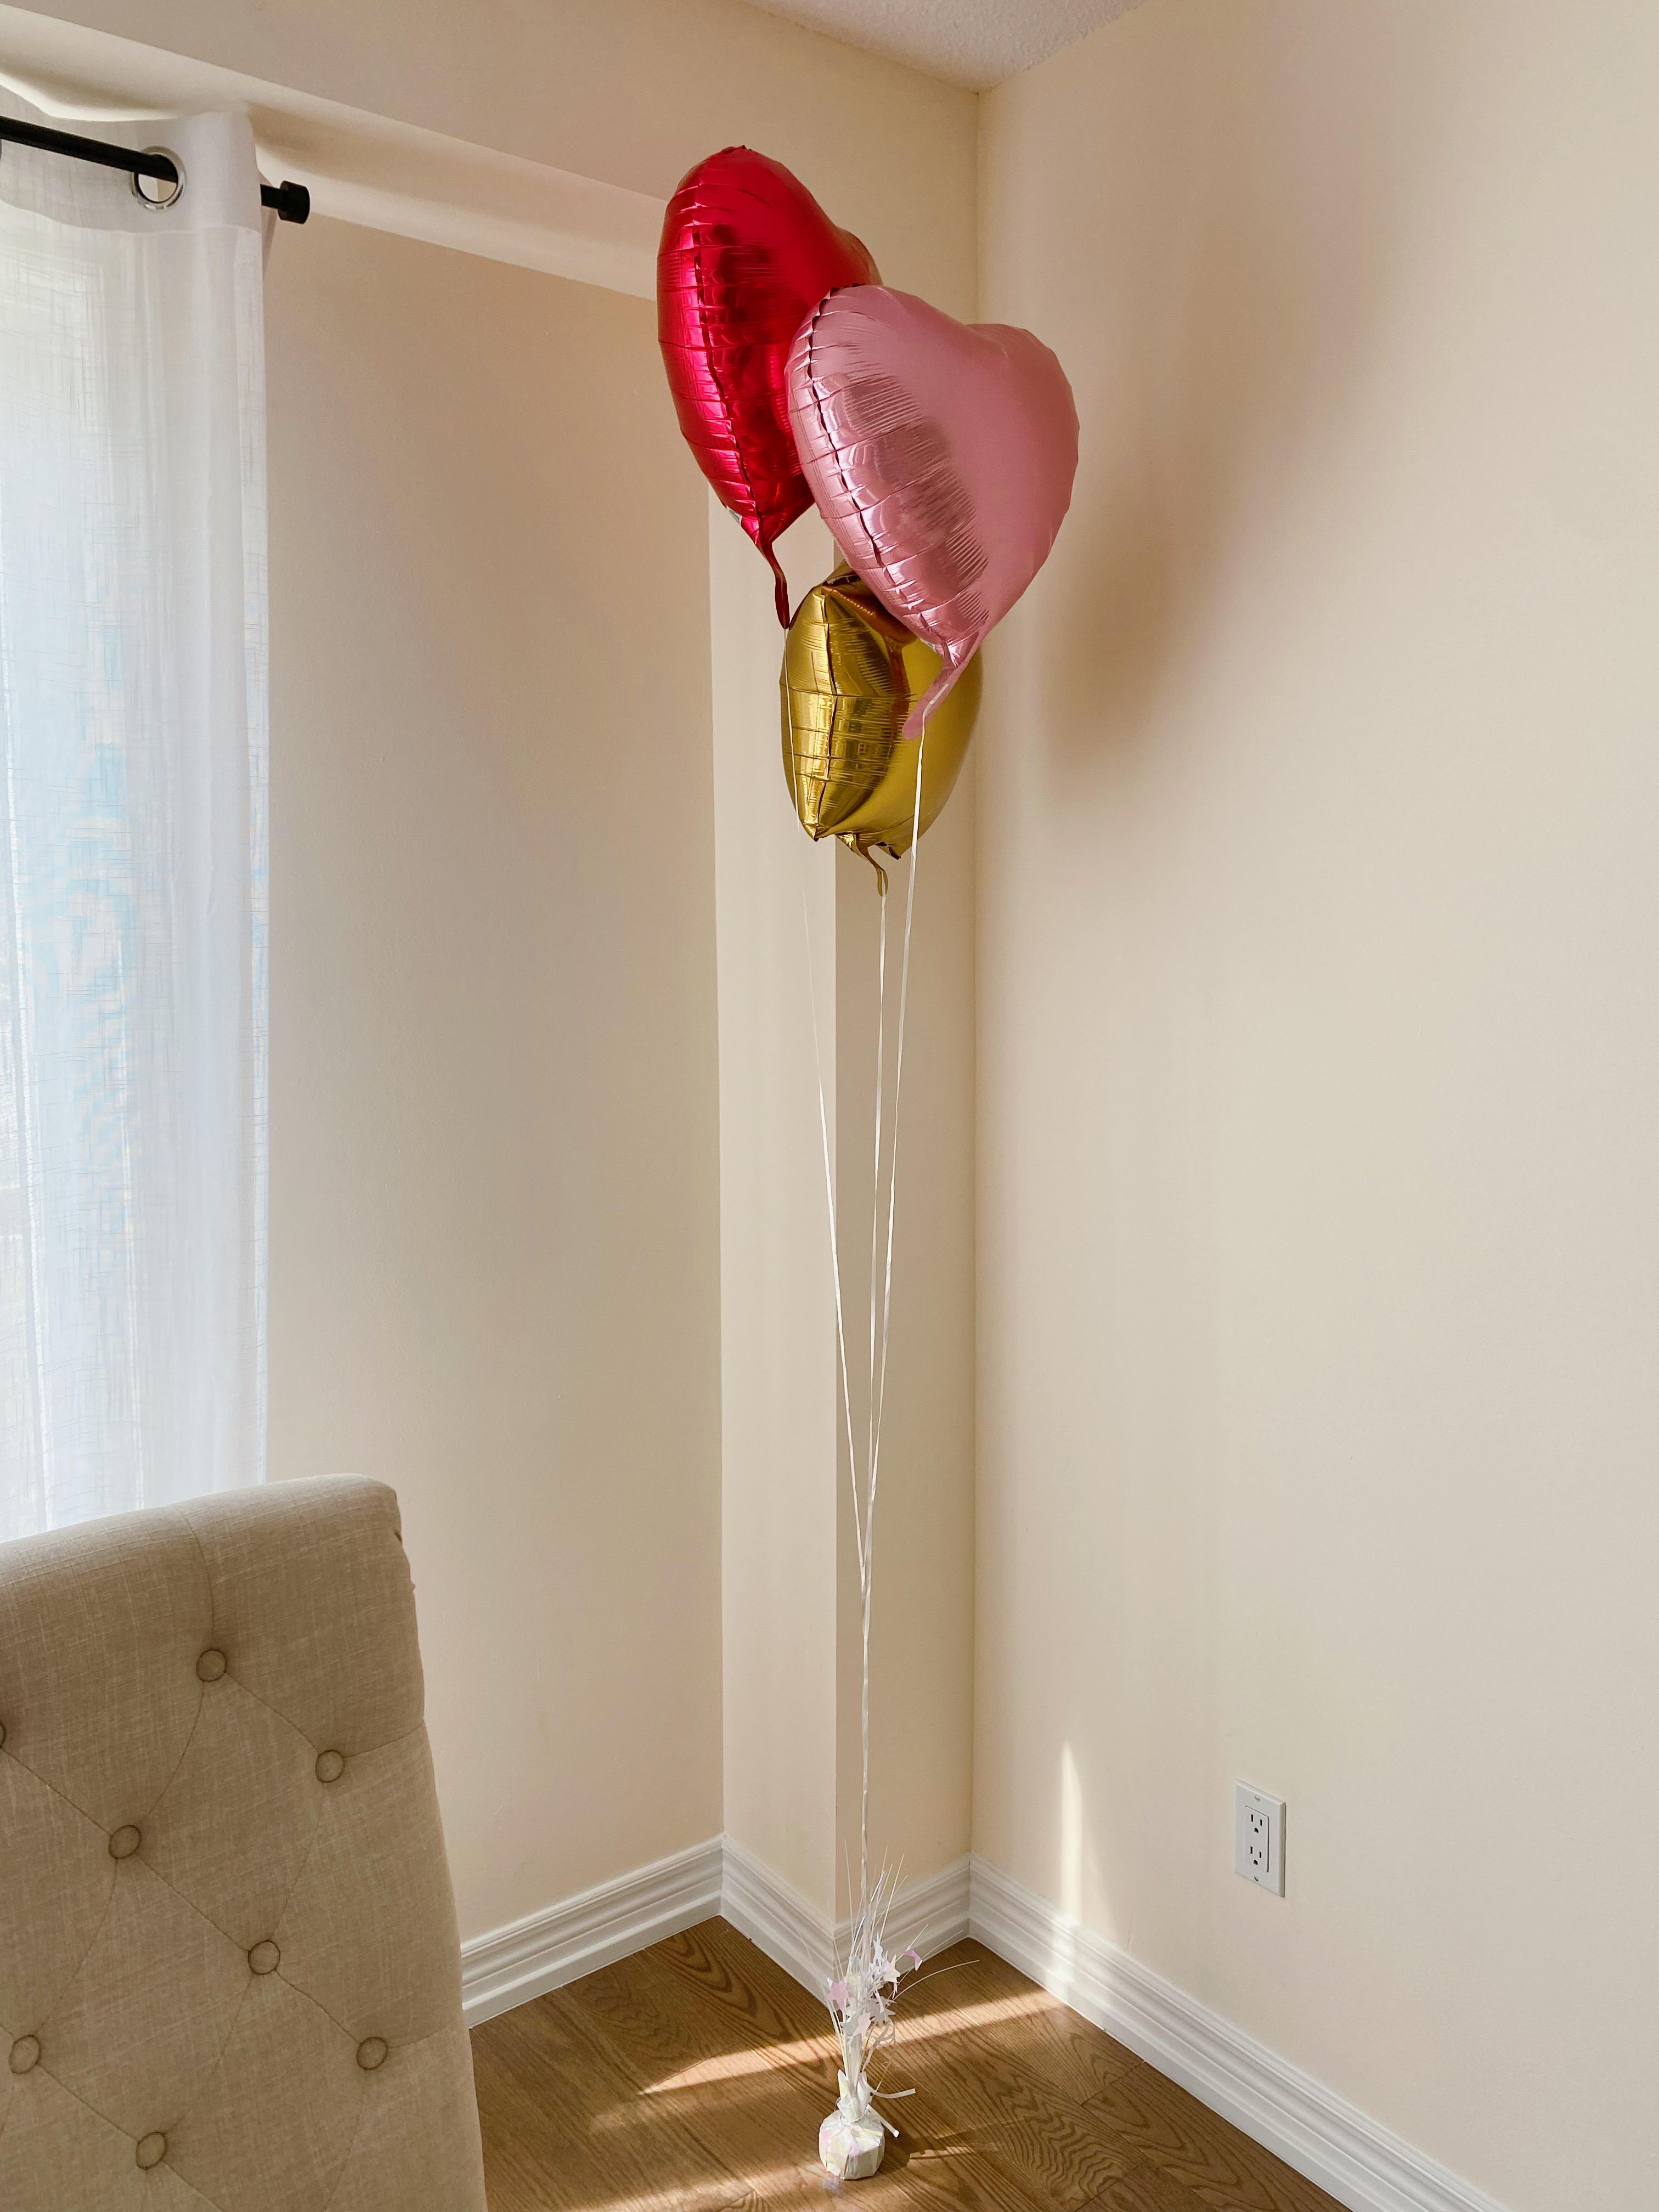
When planning any party, the first element to consider is your setup. Are you doing a sit-down meal, or serving finger foods that people can eat while standing? Will your guests be inside, outside or both? Where and how will the food and drinks be served? We had people mostly outdoors – our backyard is a lot bigger than our house! – but even for outdoor parties, I highly recommend having extra seating indoors in case of extremely hot or rainy weather (we were lucky enough to get both!) We taped a balloon and welcome sign to the front door, to help guests find our house and let them know to go right to the backyard upon arrival. I created the sign using this Canva template. Canva is such a helpful resource when it comes to DIY party invitations and signage!

In the backyard, we set up two large folding tables and chairs under a tent. We got two of these 13×13 tents from Costco, and borrowed another one from family. The Costco tents were excellent – easy to set up, and very sturdy! If your party is also outdoors, I highly recommend giving yourself peace-of-mind by either renting or buying tents. The weather can change on a dime, and you don’t want to force everyone to squeeze inside if it starts raining. It rained on and off throughout our party, and the tents allowed people to sit and eat outside comfortably, even while it was pouring.
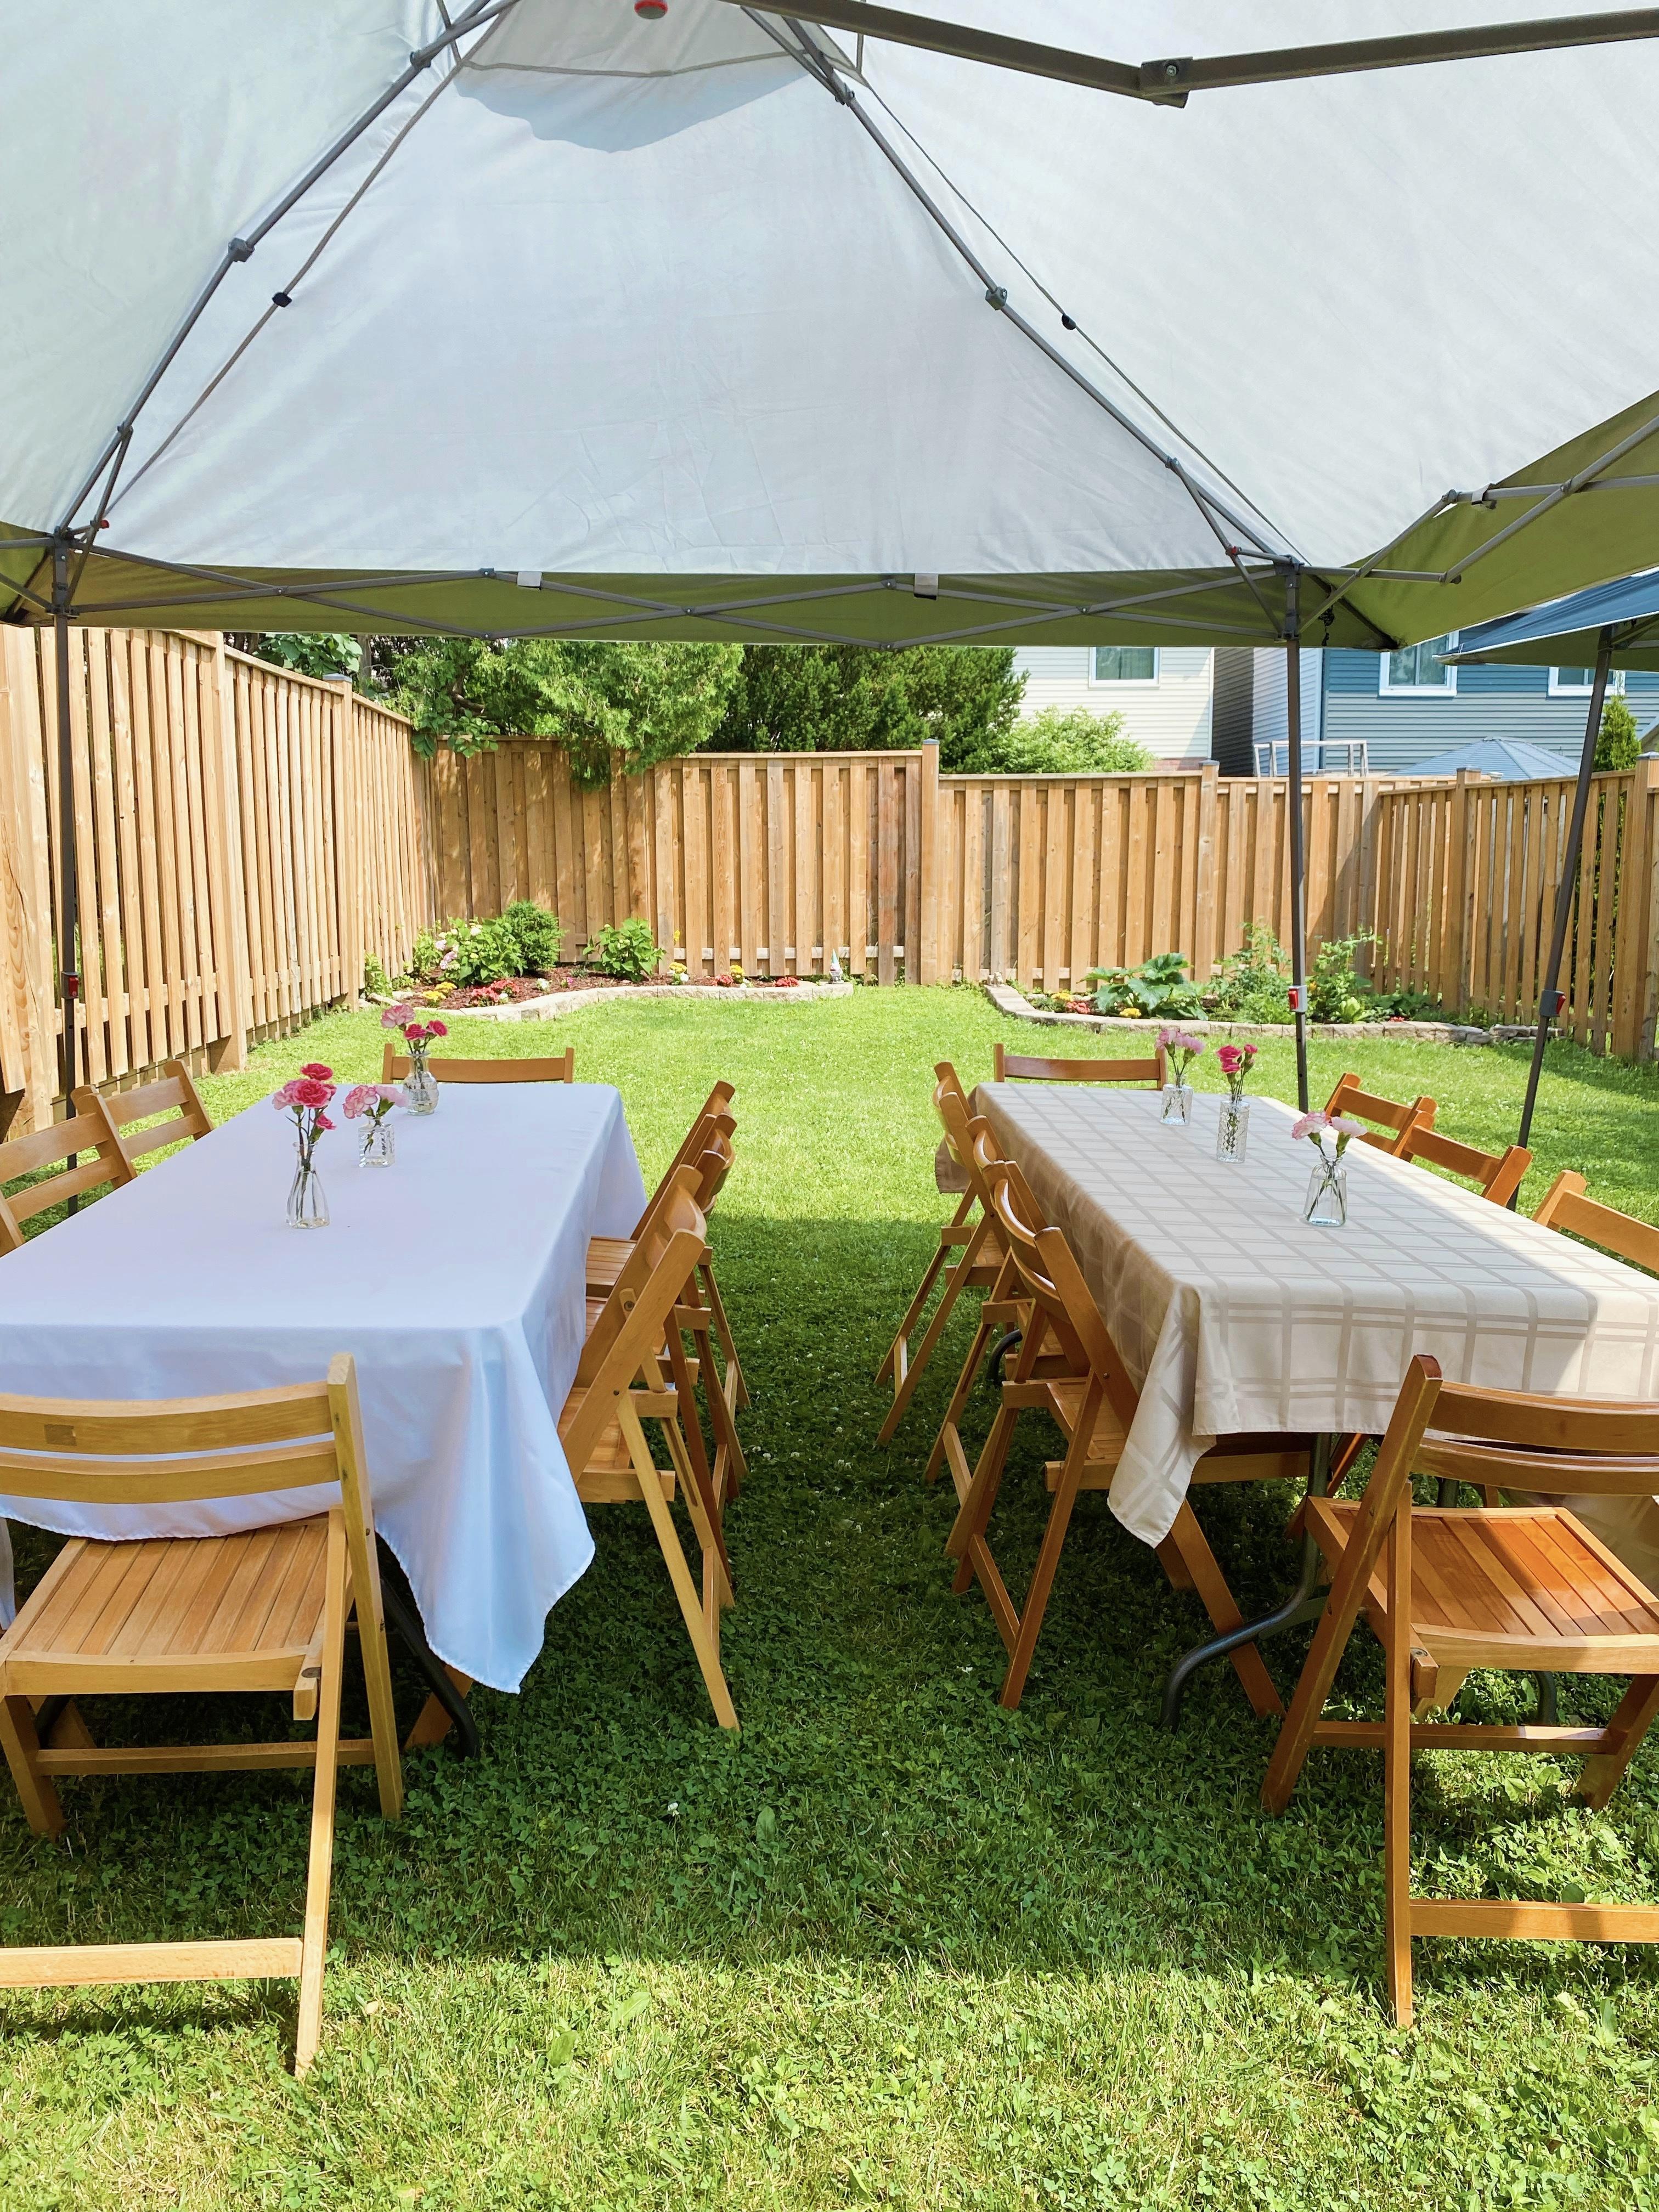
We covered the tables with tablecloths and used bud vases as centerpieces. Bud vases are one of my favourite affordable party decor hacks! Instead of blowing your budget on fancy flower arrangements, just buy some cute bud vases on Amazon (we got these: $48 for 20), buy a few grower’s bunches at your local grocery store (I got 3 bunches of pink carnations for $36 at Fortino’s) and voila! I used all 20 vases throughout our house and backyard.

On our patio, we set up an outdoor bar with wine bottles, plastic cups, a bottle opener, an ice bucket, and a marker – very important so people can label their drinks! (I always put out gold or silver markers – a black Sharpie can feel a little frat party; I think the metallic ones elevate things just a little, even for casual events. It’s the same reason I refuse to buy red solo cups!) We tied this cute burlap banner to the tent, and had two coolers underneath – one for alcoholic and one for non-alcoholic beverages – which we filled with beers, canned cocktails, wine, sodas, bubbly waters and several plastic water bottles. As much as the environmentalist in me hates plastic water bottles, they’re a must for a party of this size. They’re just so convenient, and it’s essential to keep your guests well-hydrated, especially at a summer party. Who wants to be refilling a water pitcher every five minutes!? We used our Google Nest Mini to play the party playlist we’d made (check it out here on Spotify if you’re so inclined!)

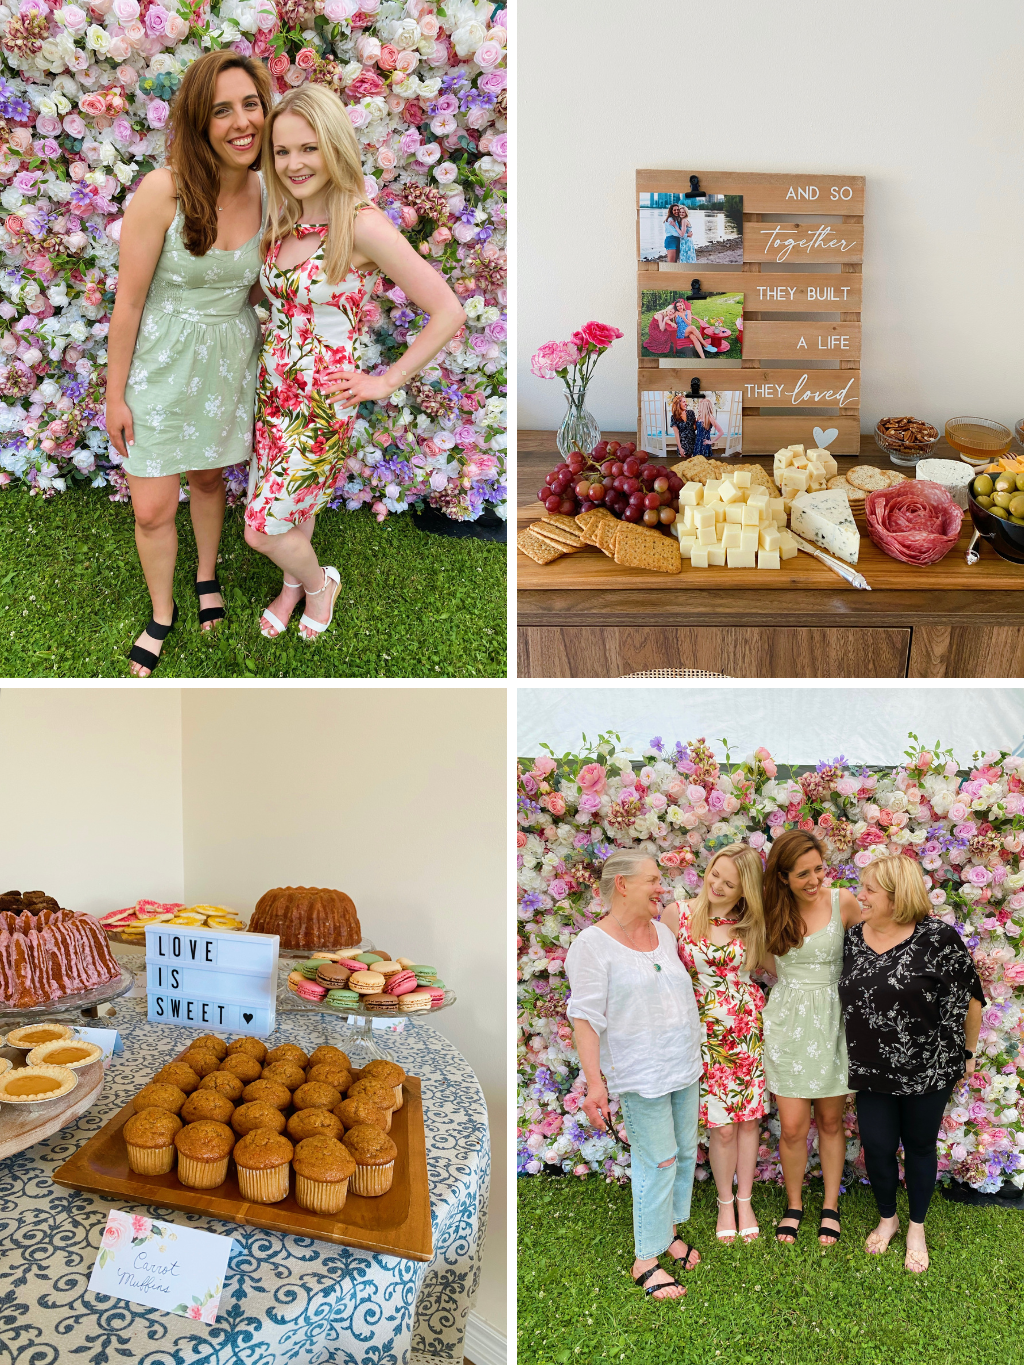
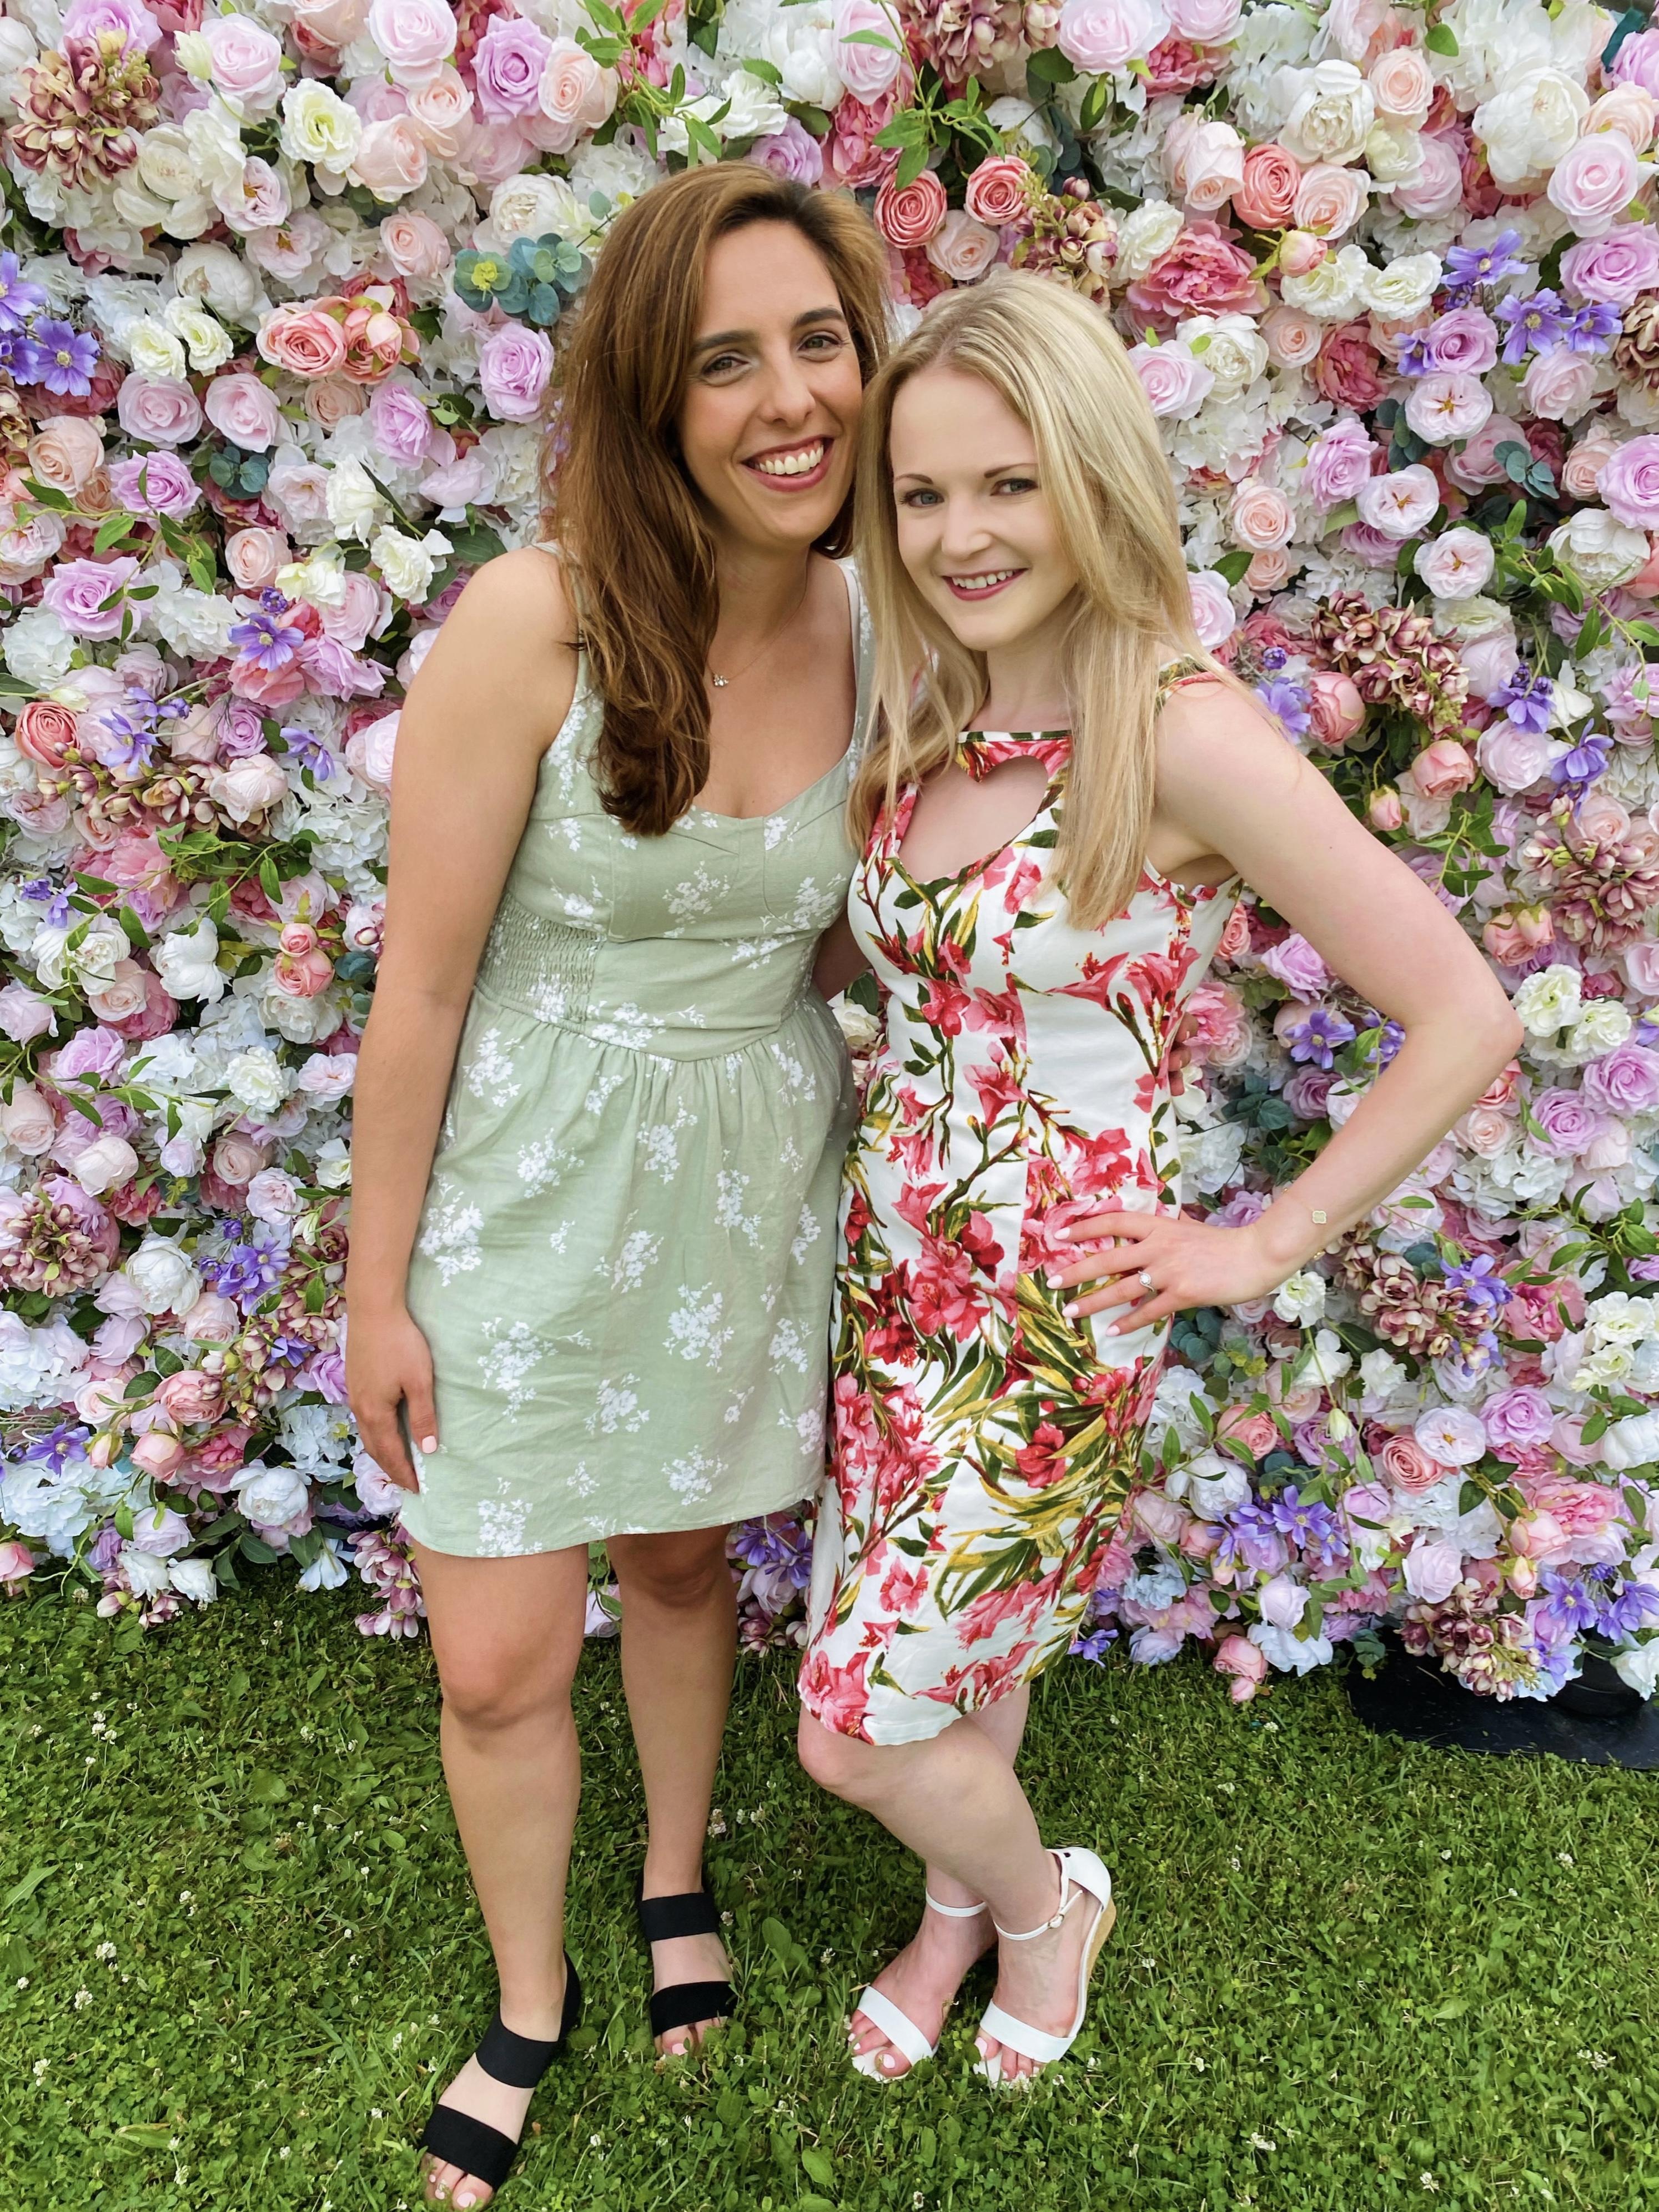
Under another tent, we had the pièce de résistance: the flower wall! As much as I love affordable decor from Amazon and the like, I do think there’s something to be said for splurging on one fabulous piece of decor. Even Tania – who took some serious convincing – admitted she was so glad we got it. It was the perfect photo backdrop and added such a pretty garden party vibe; people were taking photos with it all day! We rented it from Somis Floral Decor and I seriously can’t recommend them enough. They came right on time, set up promptly, were so professional and lovely to work with, and the wall was one of the prettiest ones I’ve ever seen. They were also quite affordable as far as flower walls go!


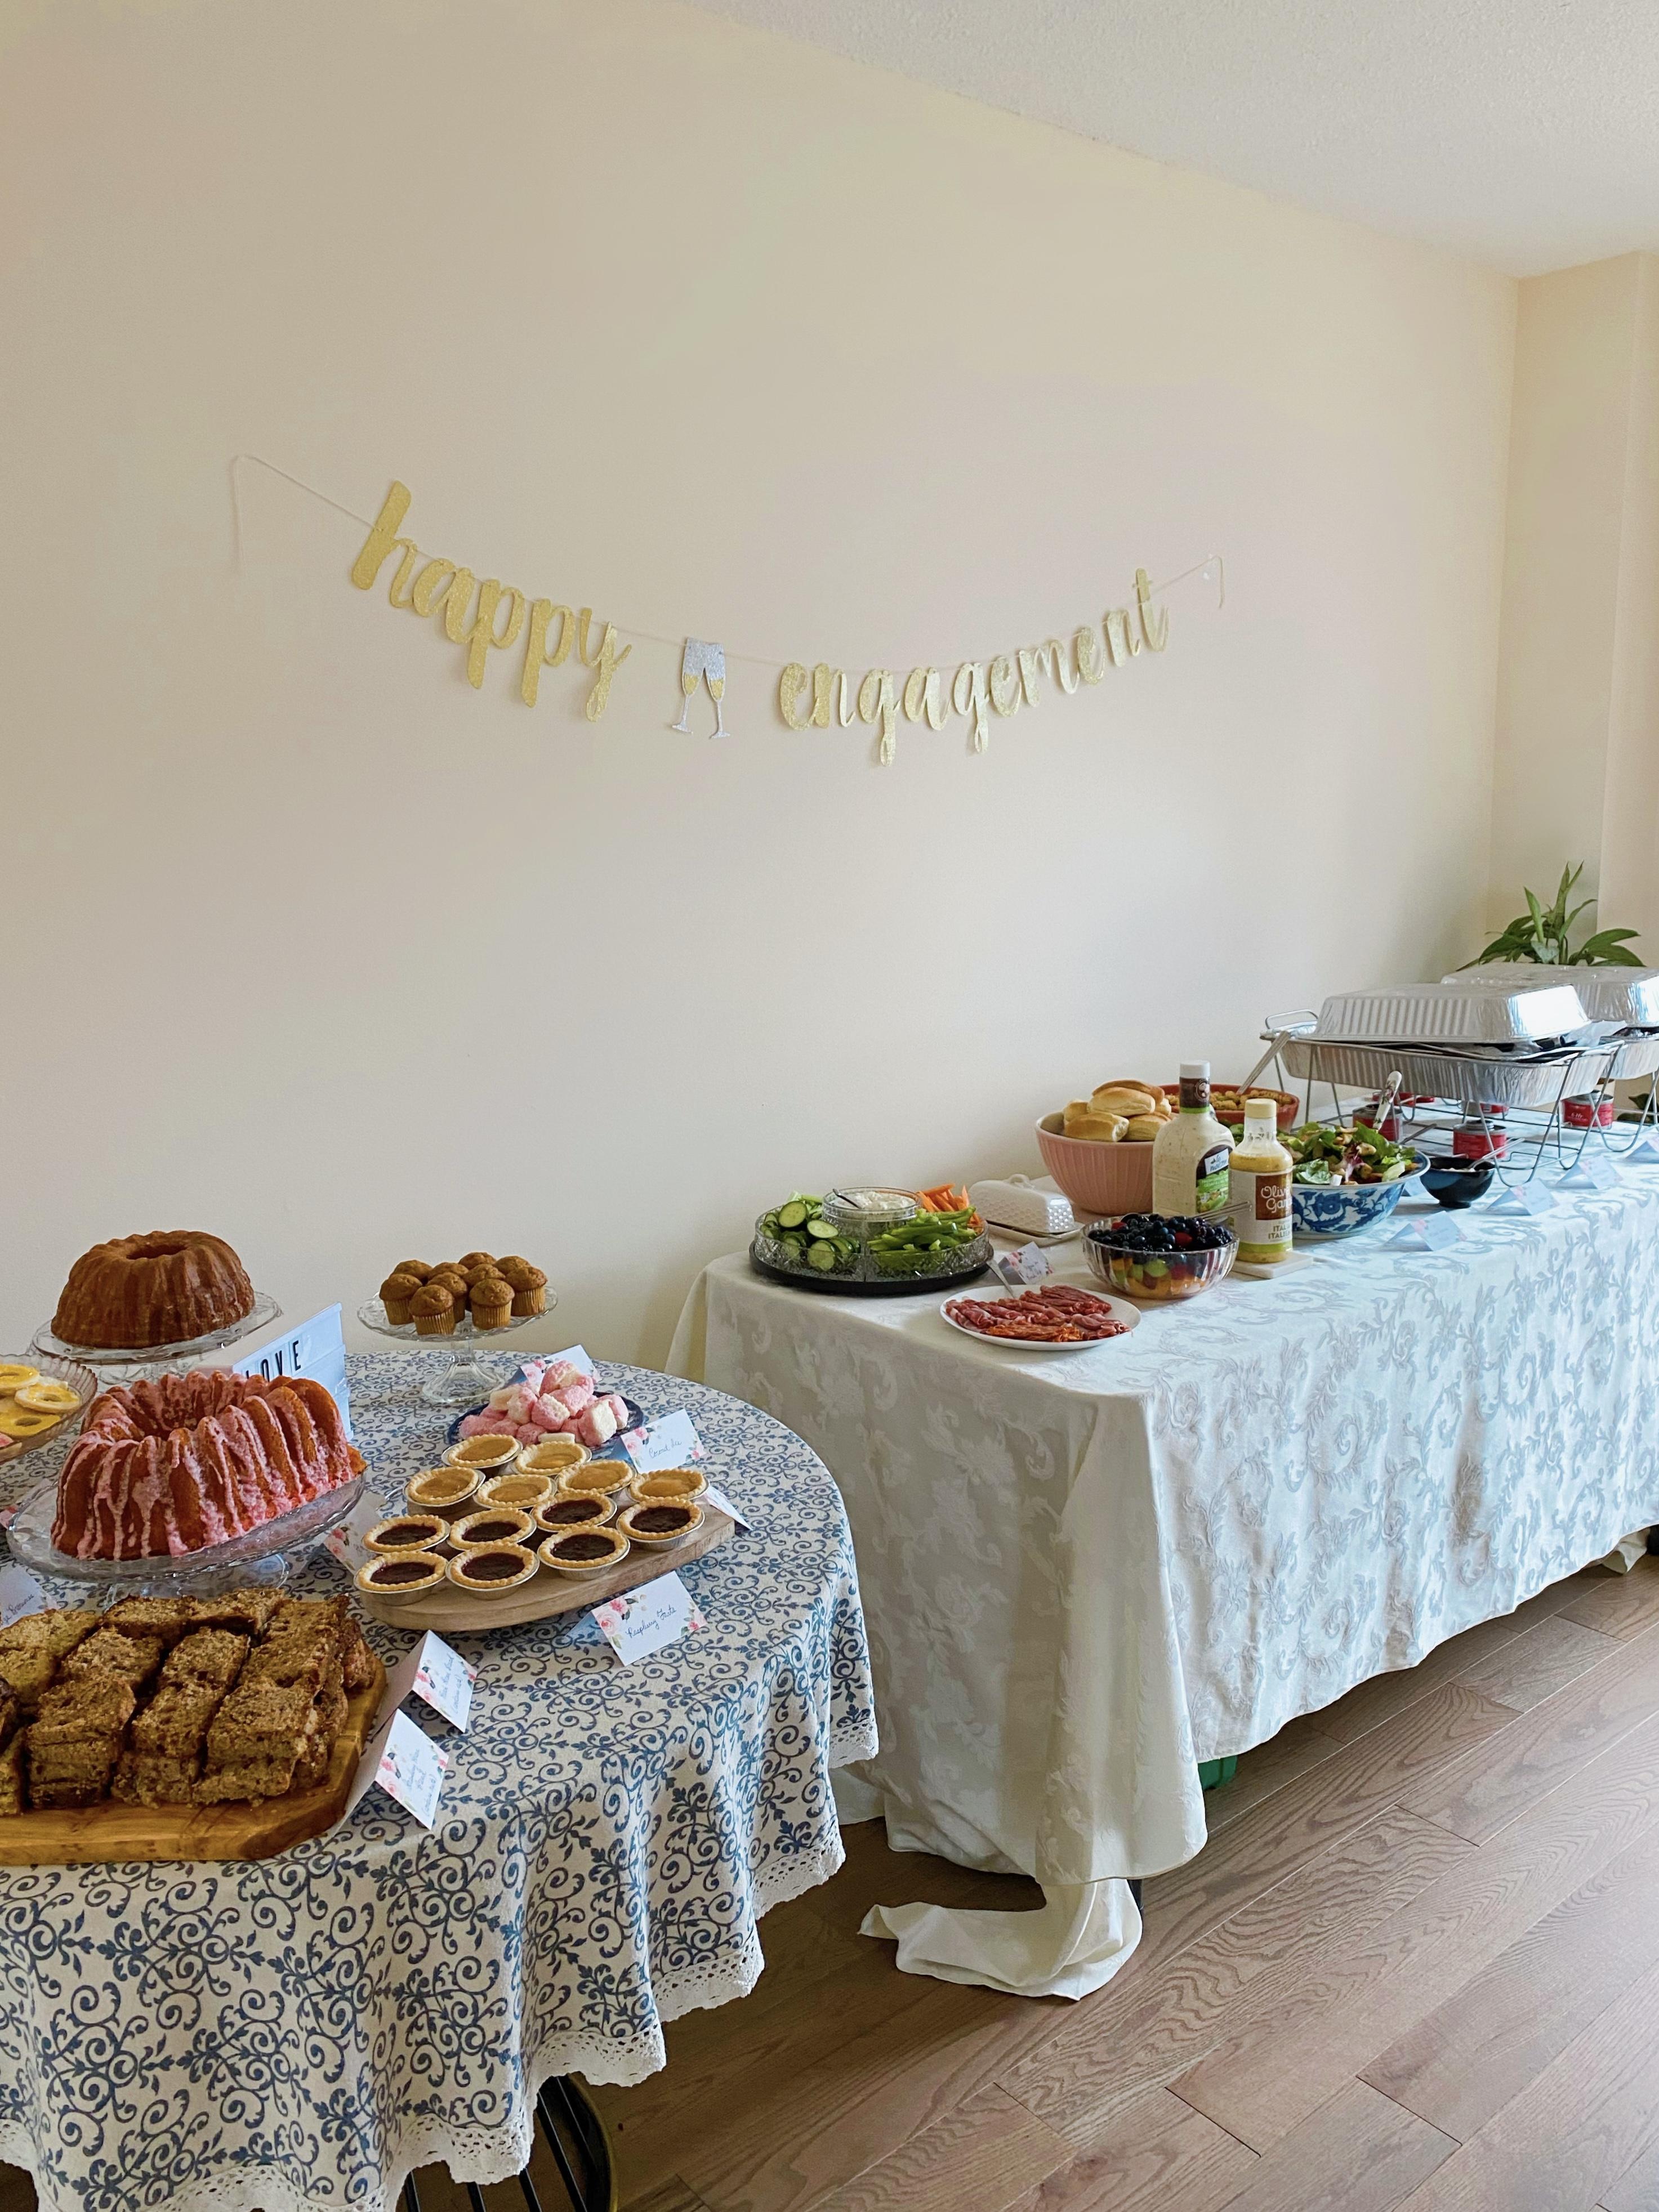
Indoors, we set up two tables back-to-back in our living room. These folding tables from Costco are the best! We have four in the family that we rotate around as needed. If you host frequently, I highly recommend going in with family/friends and buying a few – that way, everyone only needs to store one or two, and you can pool resources as needed when events come up. On that note, we were also lucky enough to borrow the majority of the chairs from Tania’s relatives, and interspersed them with our own dining chairs. (Does it drive me a little nuts that they don’t match? Sure… but at the end of the day, who cares! One lesson that’s been hard – but essential – for this diehard perfectionist to learn: hosting a crowd inevitably means letting go of perfection.) We taped this banner – another Amazon find – behind the table, and got some cute balloons from Dollar Tree to stick in the corner.

We set up a small indoor drink station on our bar cart. I used that same Canva template (linked above) to create this cute little sign, which I put inside a gold Dollarama frame.


Our dining room was the food area, and we served everything buffet-style. On the main table (another one of those handy dandy Costco folding tables) we had a green garden salad, fruit salad, pasta salad, cold cuts, perogies, fried pork and chicken kabobs, crudites with dip, and rolls with butter. We bought paper plates at Costco and got a great deal on plastic cutlery at a local liquidation centre. (I know disposable serveware isn’t the most elegant or eco-friendly option, but it’s really the best option for crowds this size.) We dressed up the wall with – what else – another Amazon banner!


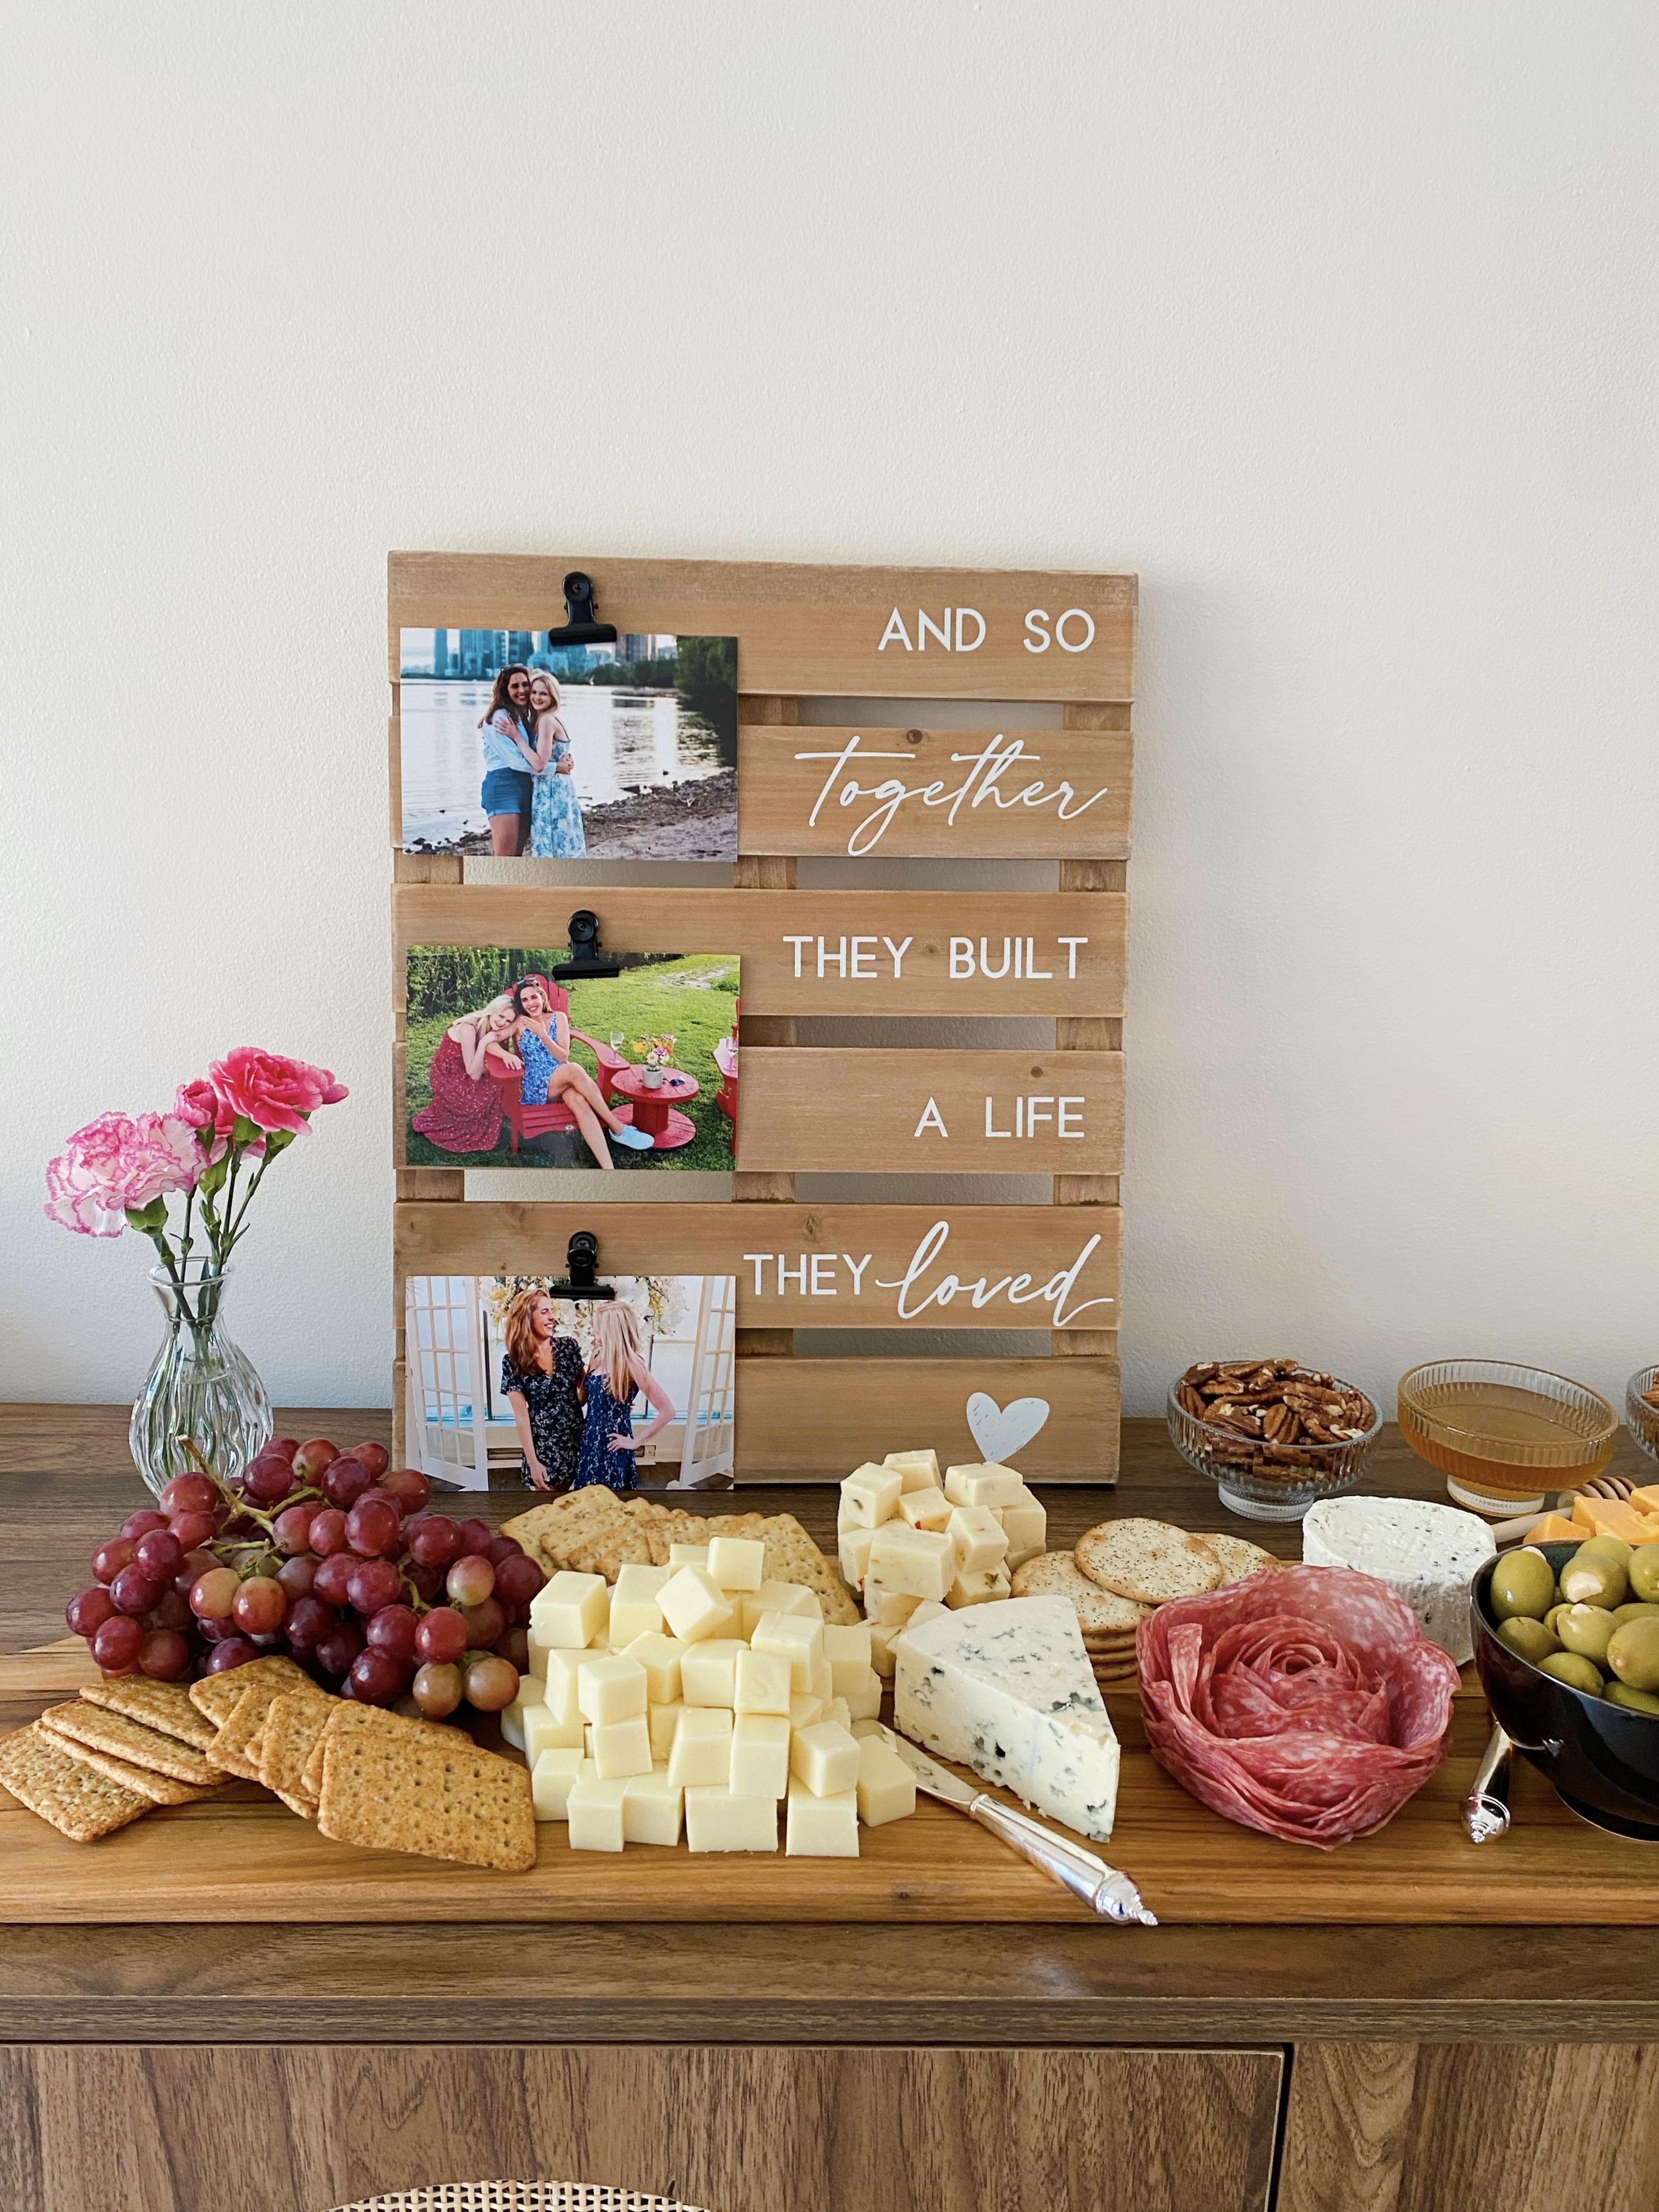
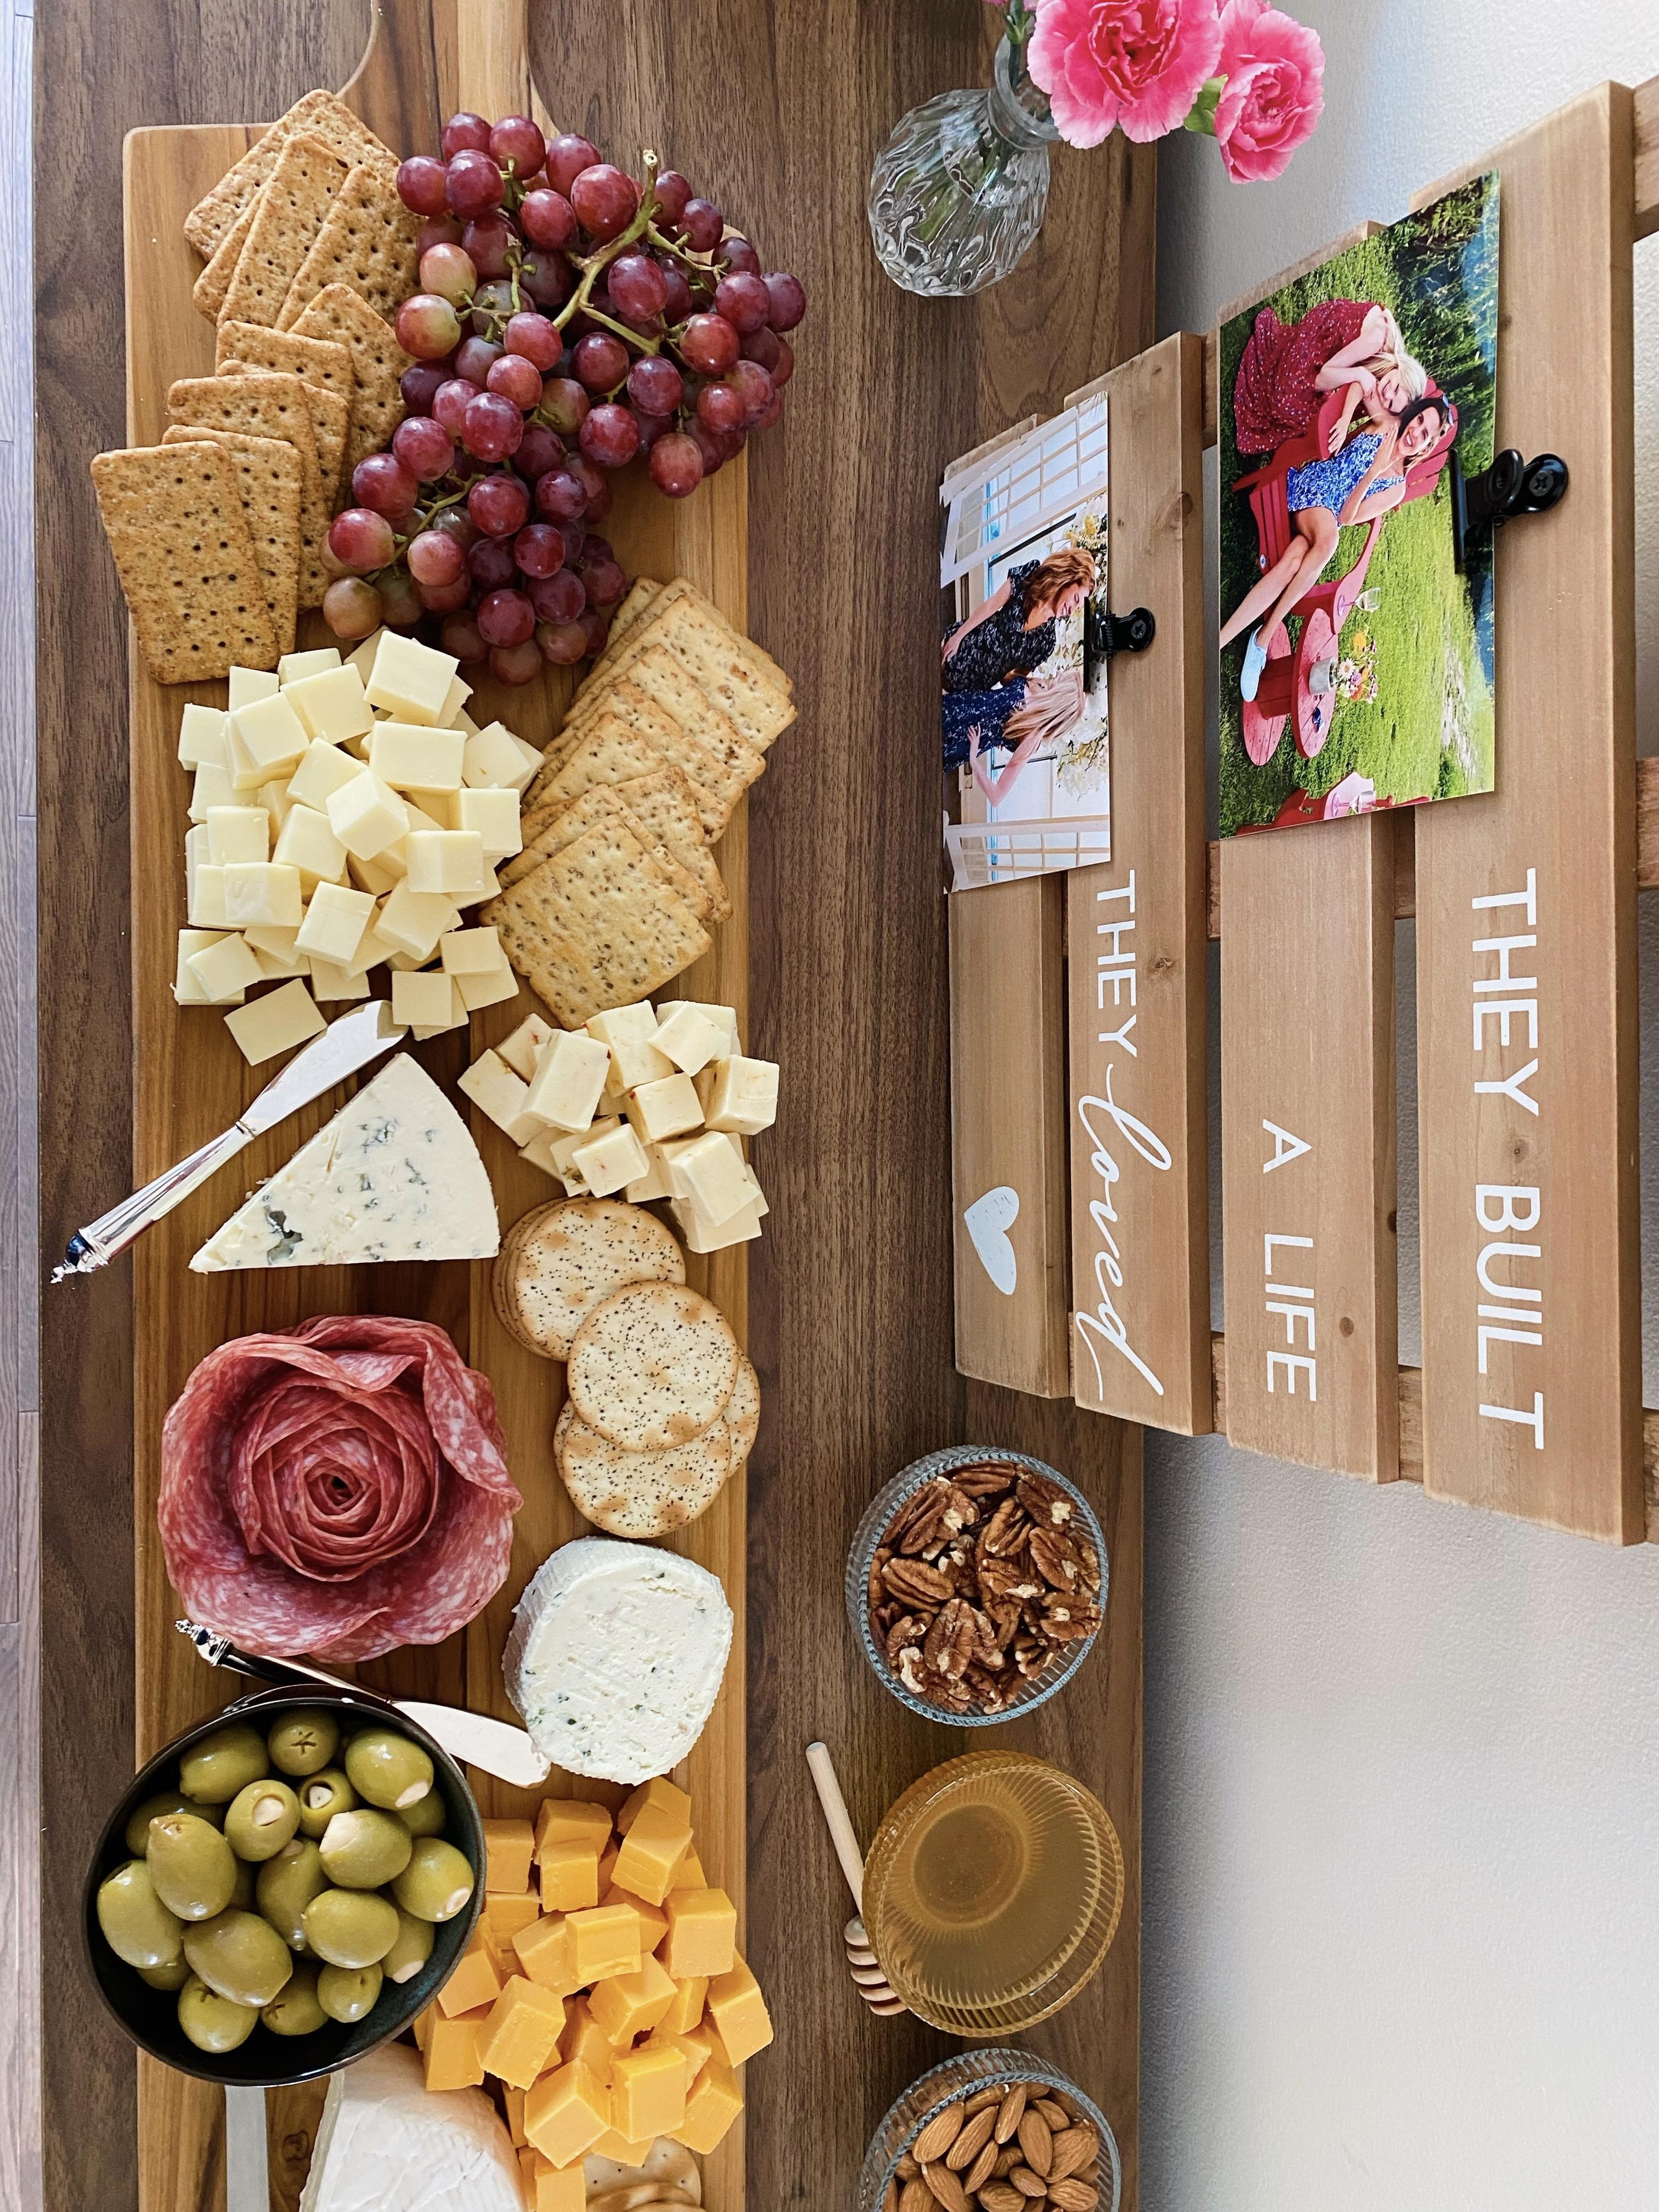
On our sideboard, we put out a large charcuterie board. I love charcuterie boards for parties! They always look beautiful and impressive, are easy to assemble, and have something to satisfy every palate. I always like to have a good variety of cheeses, and lots of different spreads and accoutrements. We put out Brie, Boursin, blue cheese, various hard cheeses (gouda, cheddar, Monterey Jack), salami, crackers, grapes, olives, pecans, almonds, honey and jam. We propped this adorable sign against the wall (a Hobby Lobby find from our most recent Buffalo trip) and displayed photos from our proposals.

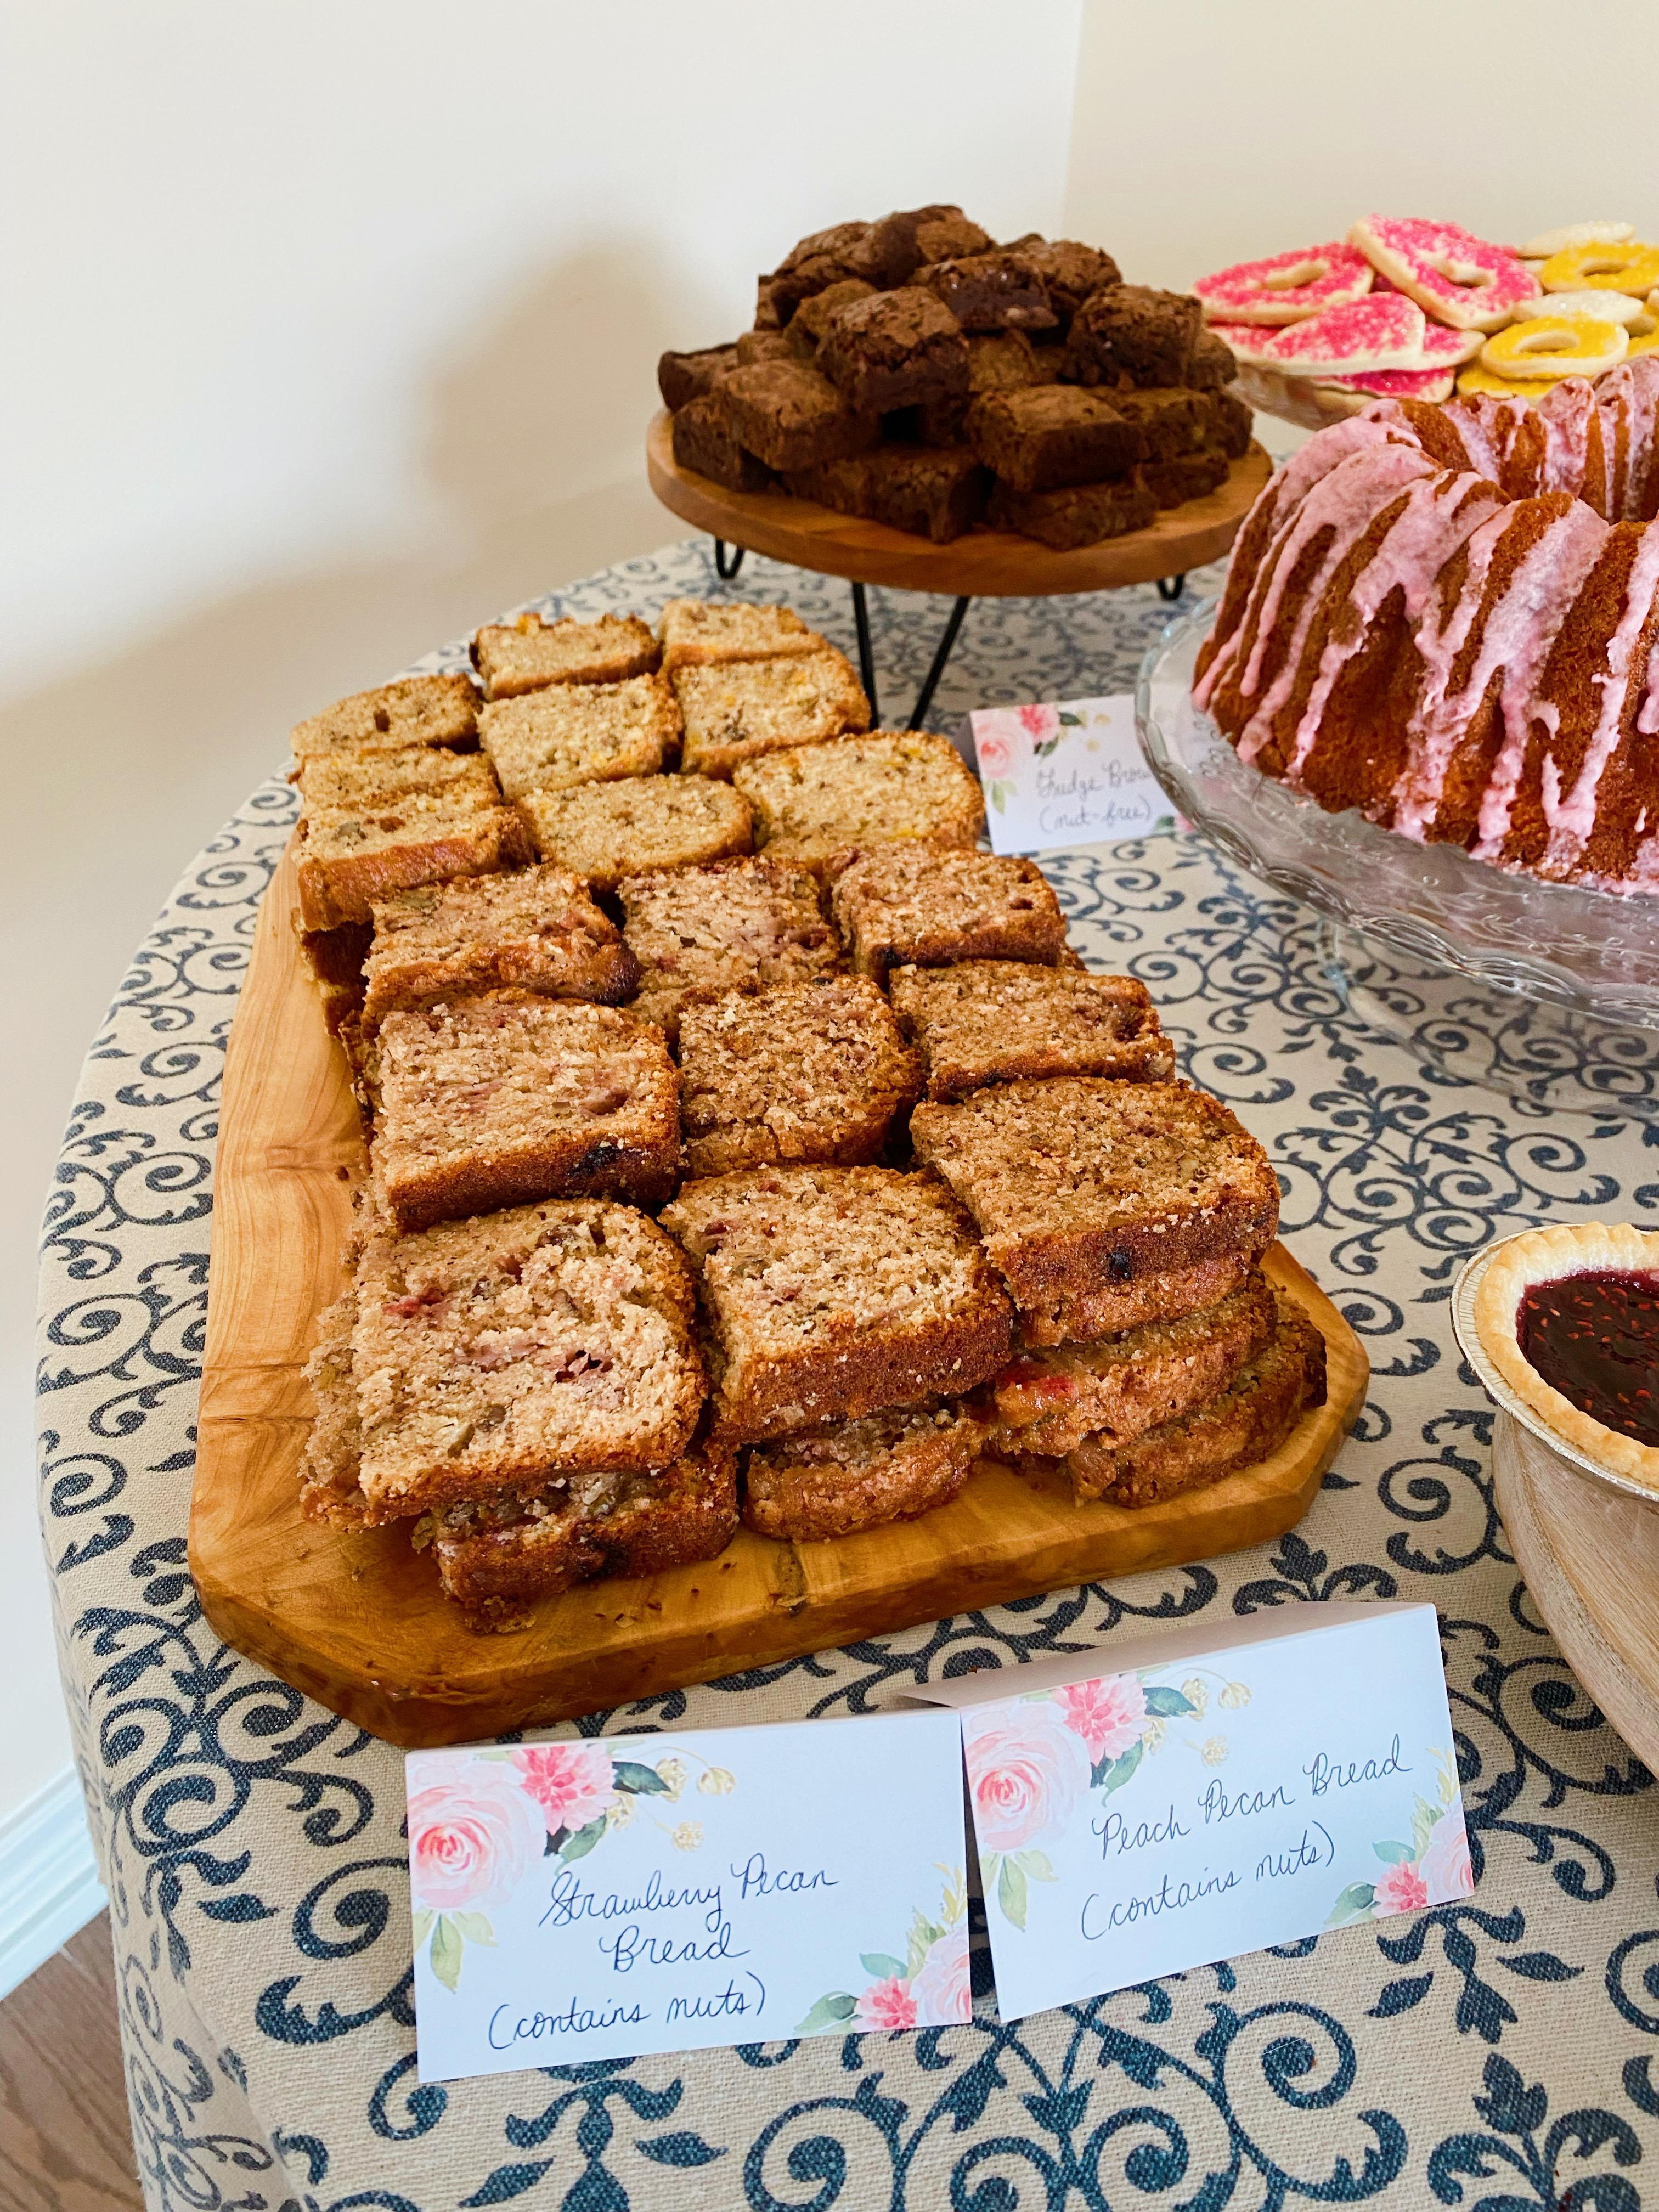
As a dedicated baker and self-confessed sweet tooth, I was of course most excited about the dessert table! We had two different types of bundt cake (lemon and strawberry), ring and heart-shaped sugar cookies, brownies, strawberry and peach pecan bread, lemon and raspberry tarts, carrot mini muffins, and macarons. The muffins and macarons were store-bought; I’m proud to say I made everything else myself! We used our trusty letterboard to write a cute, on-theme message.
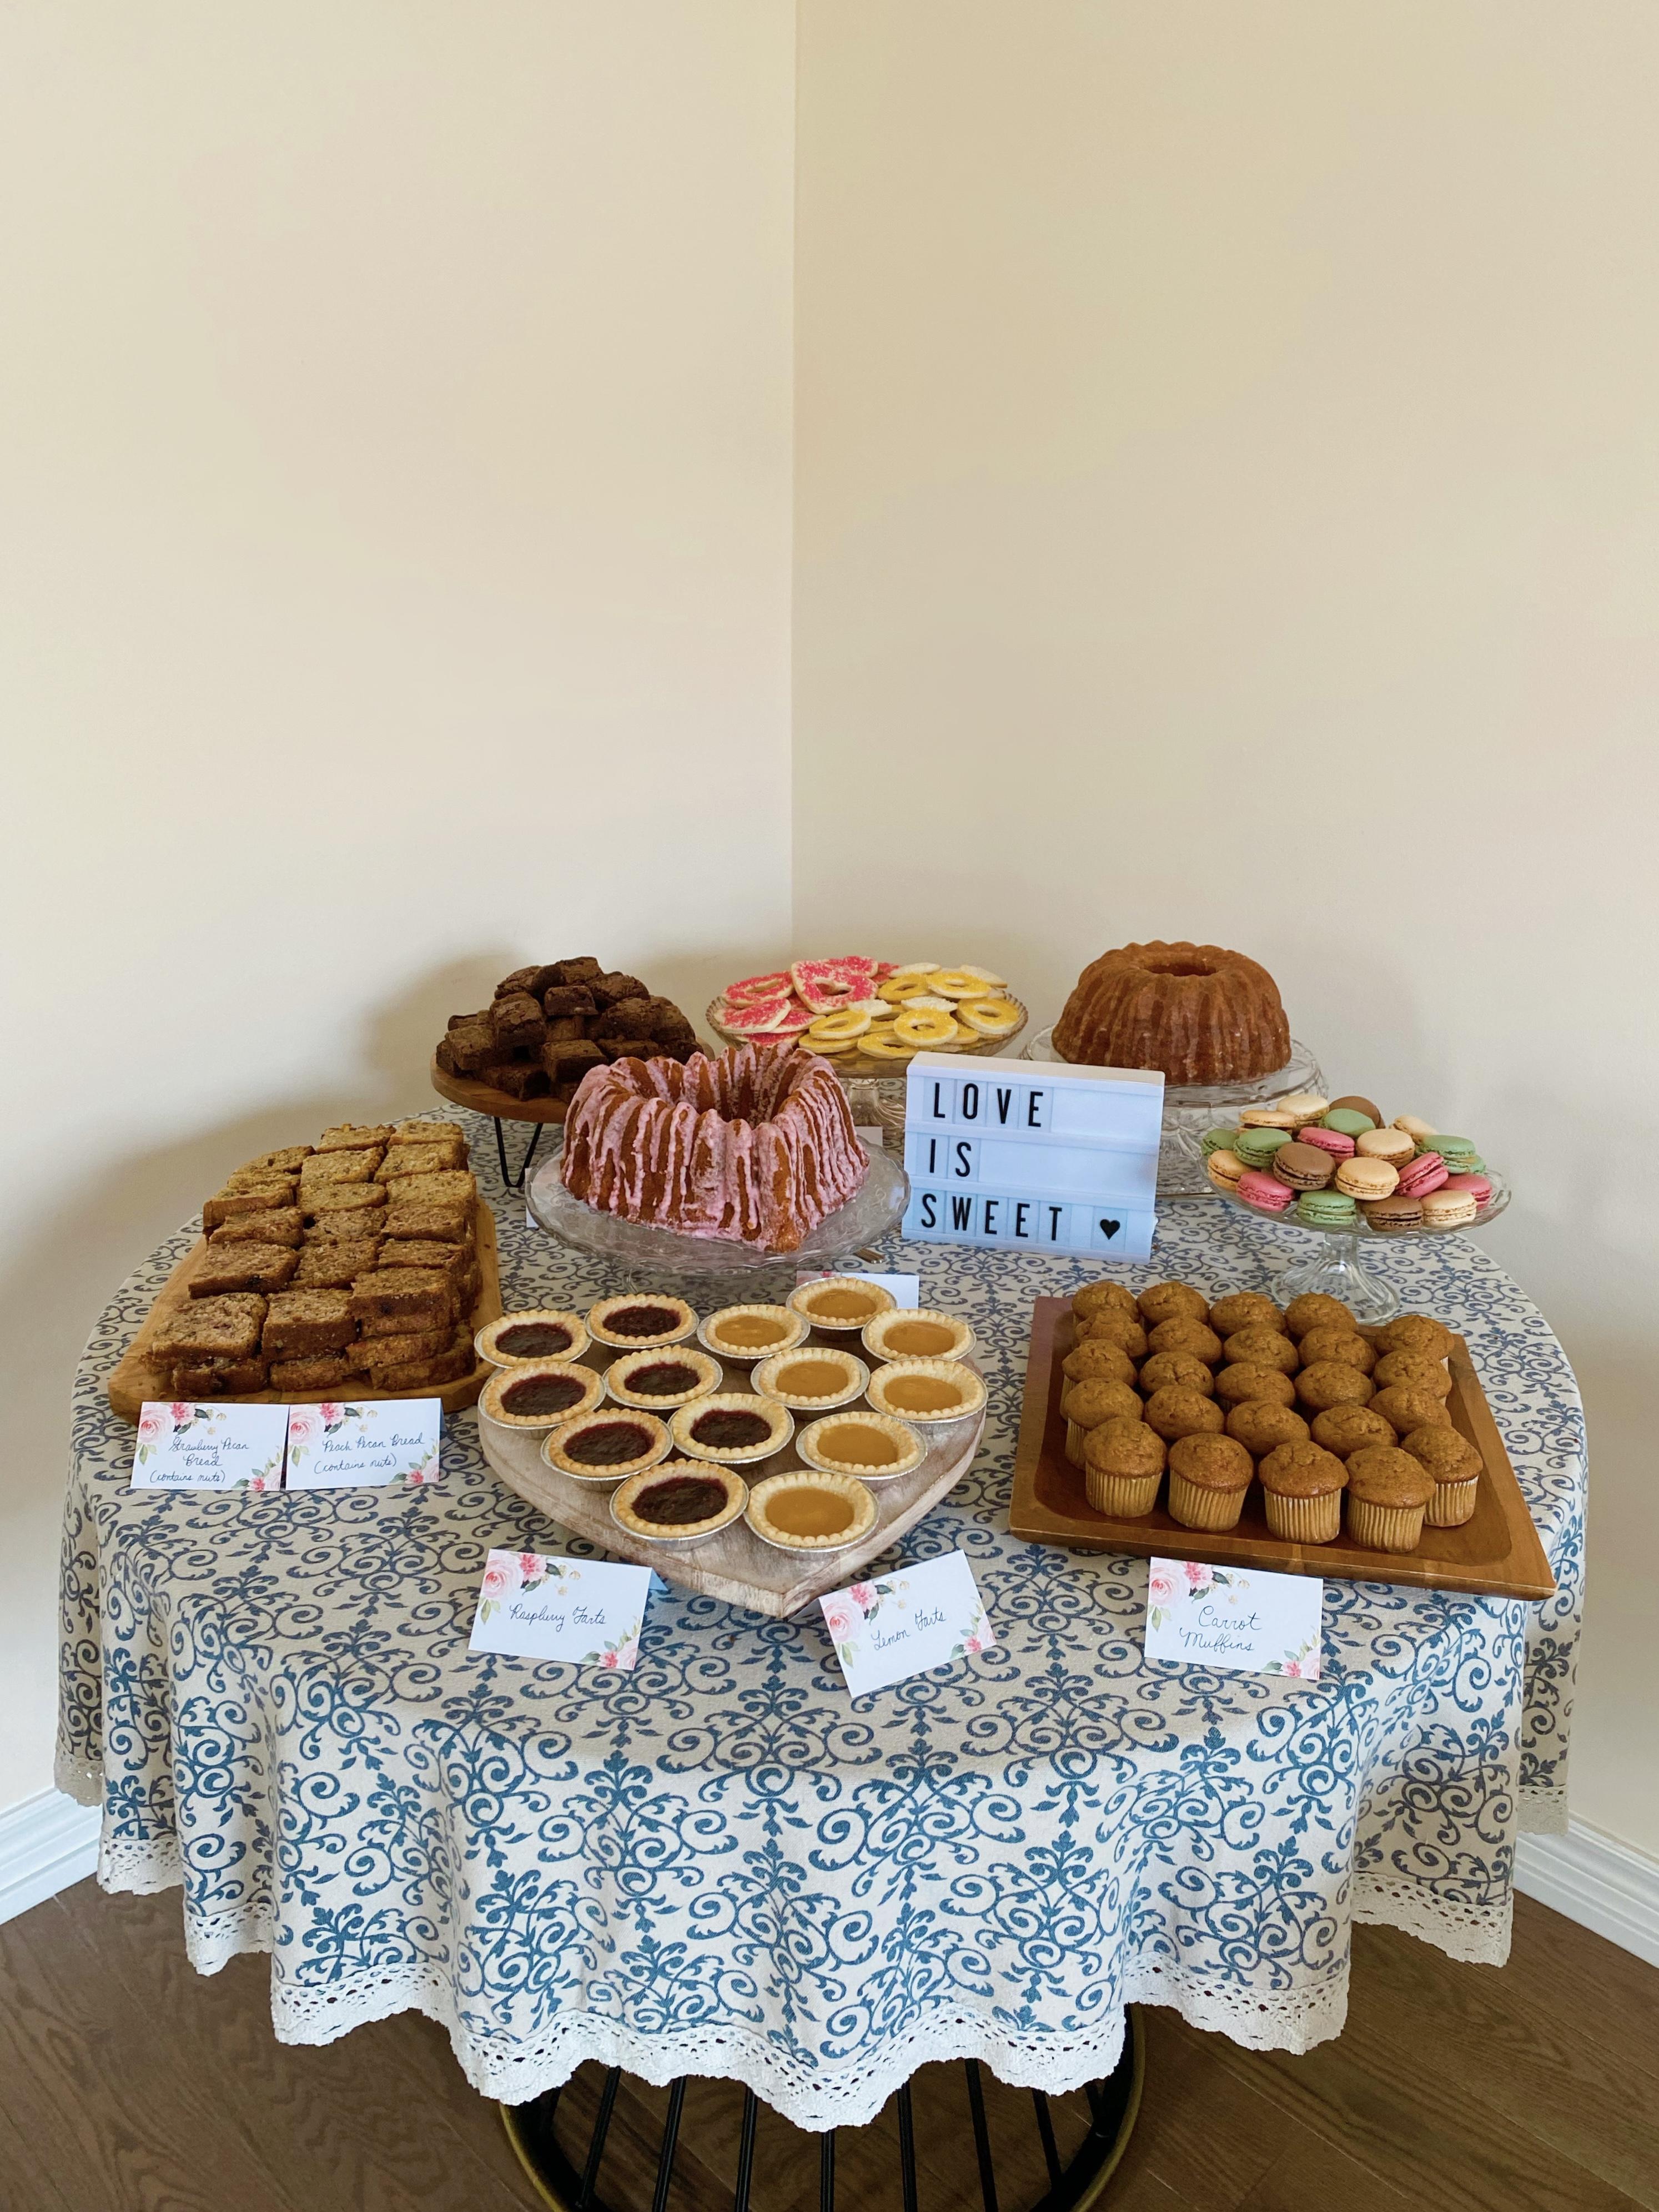
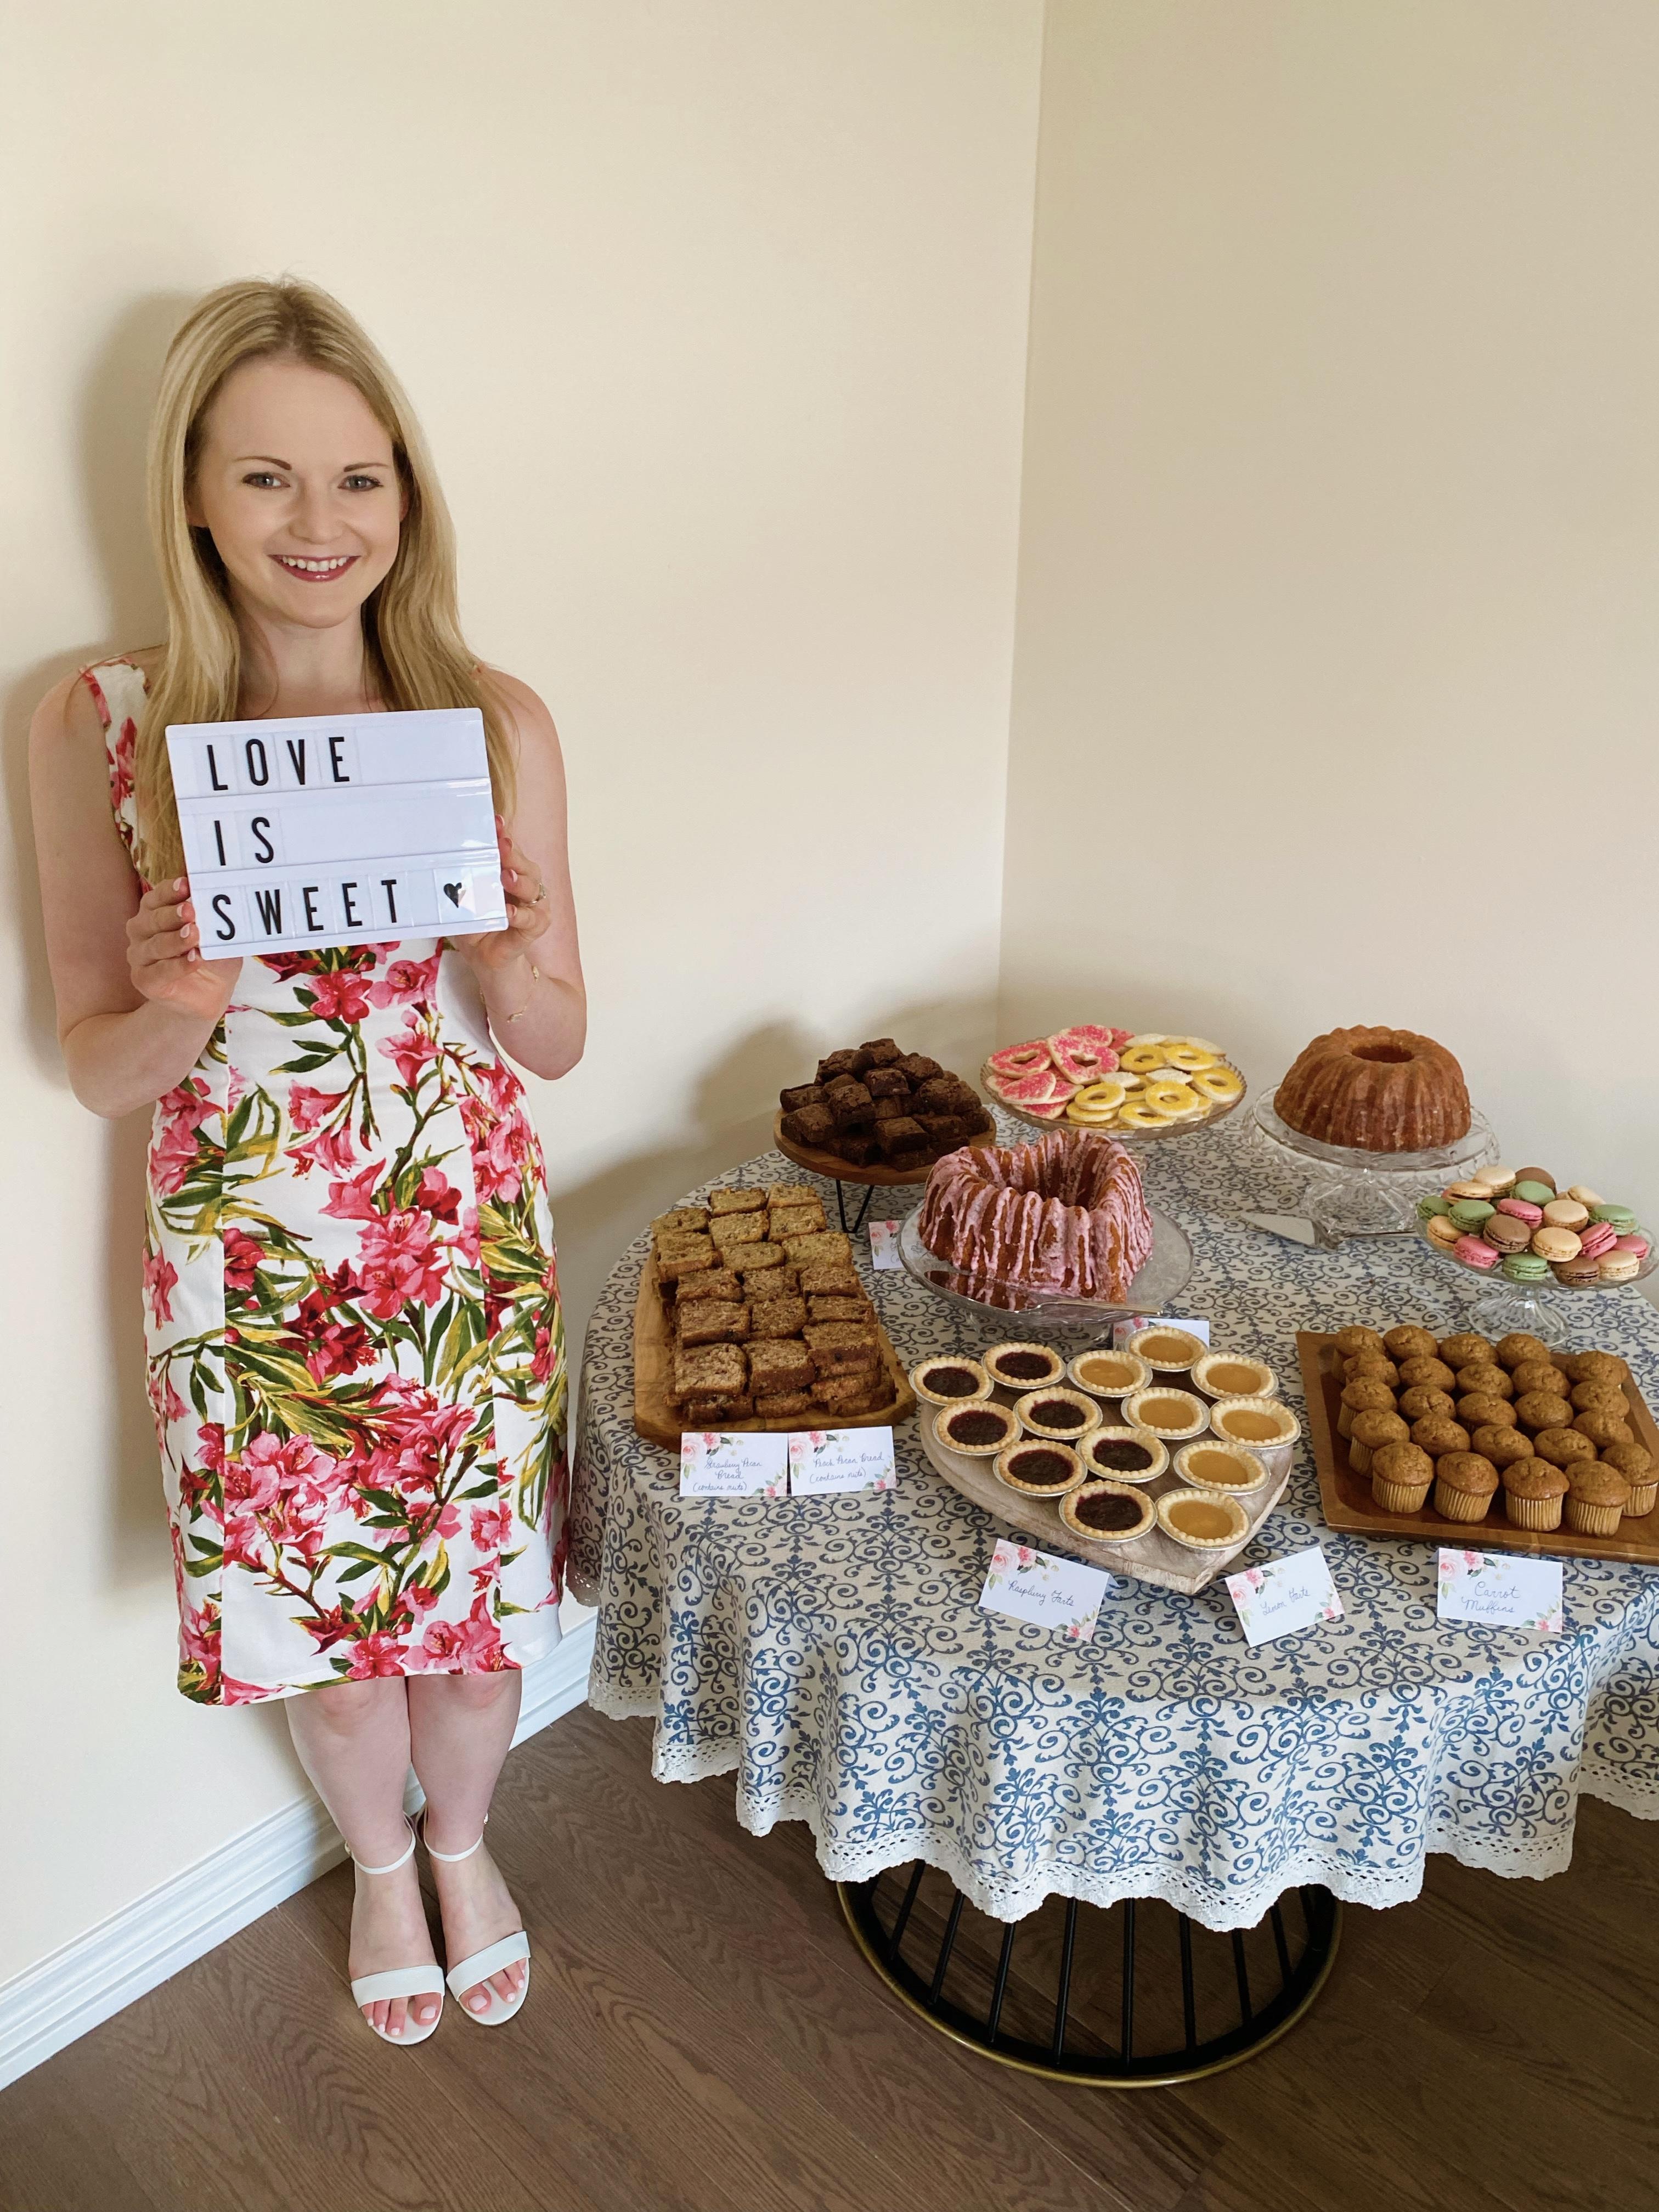
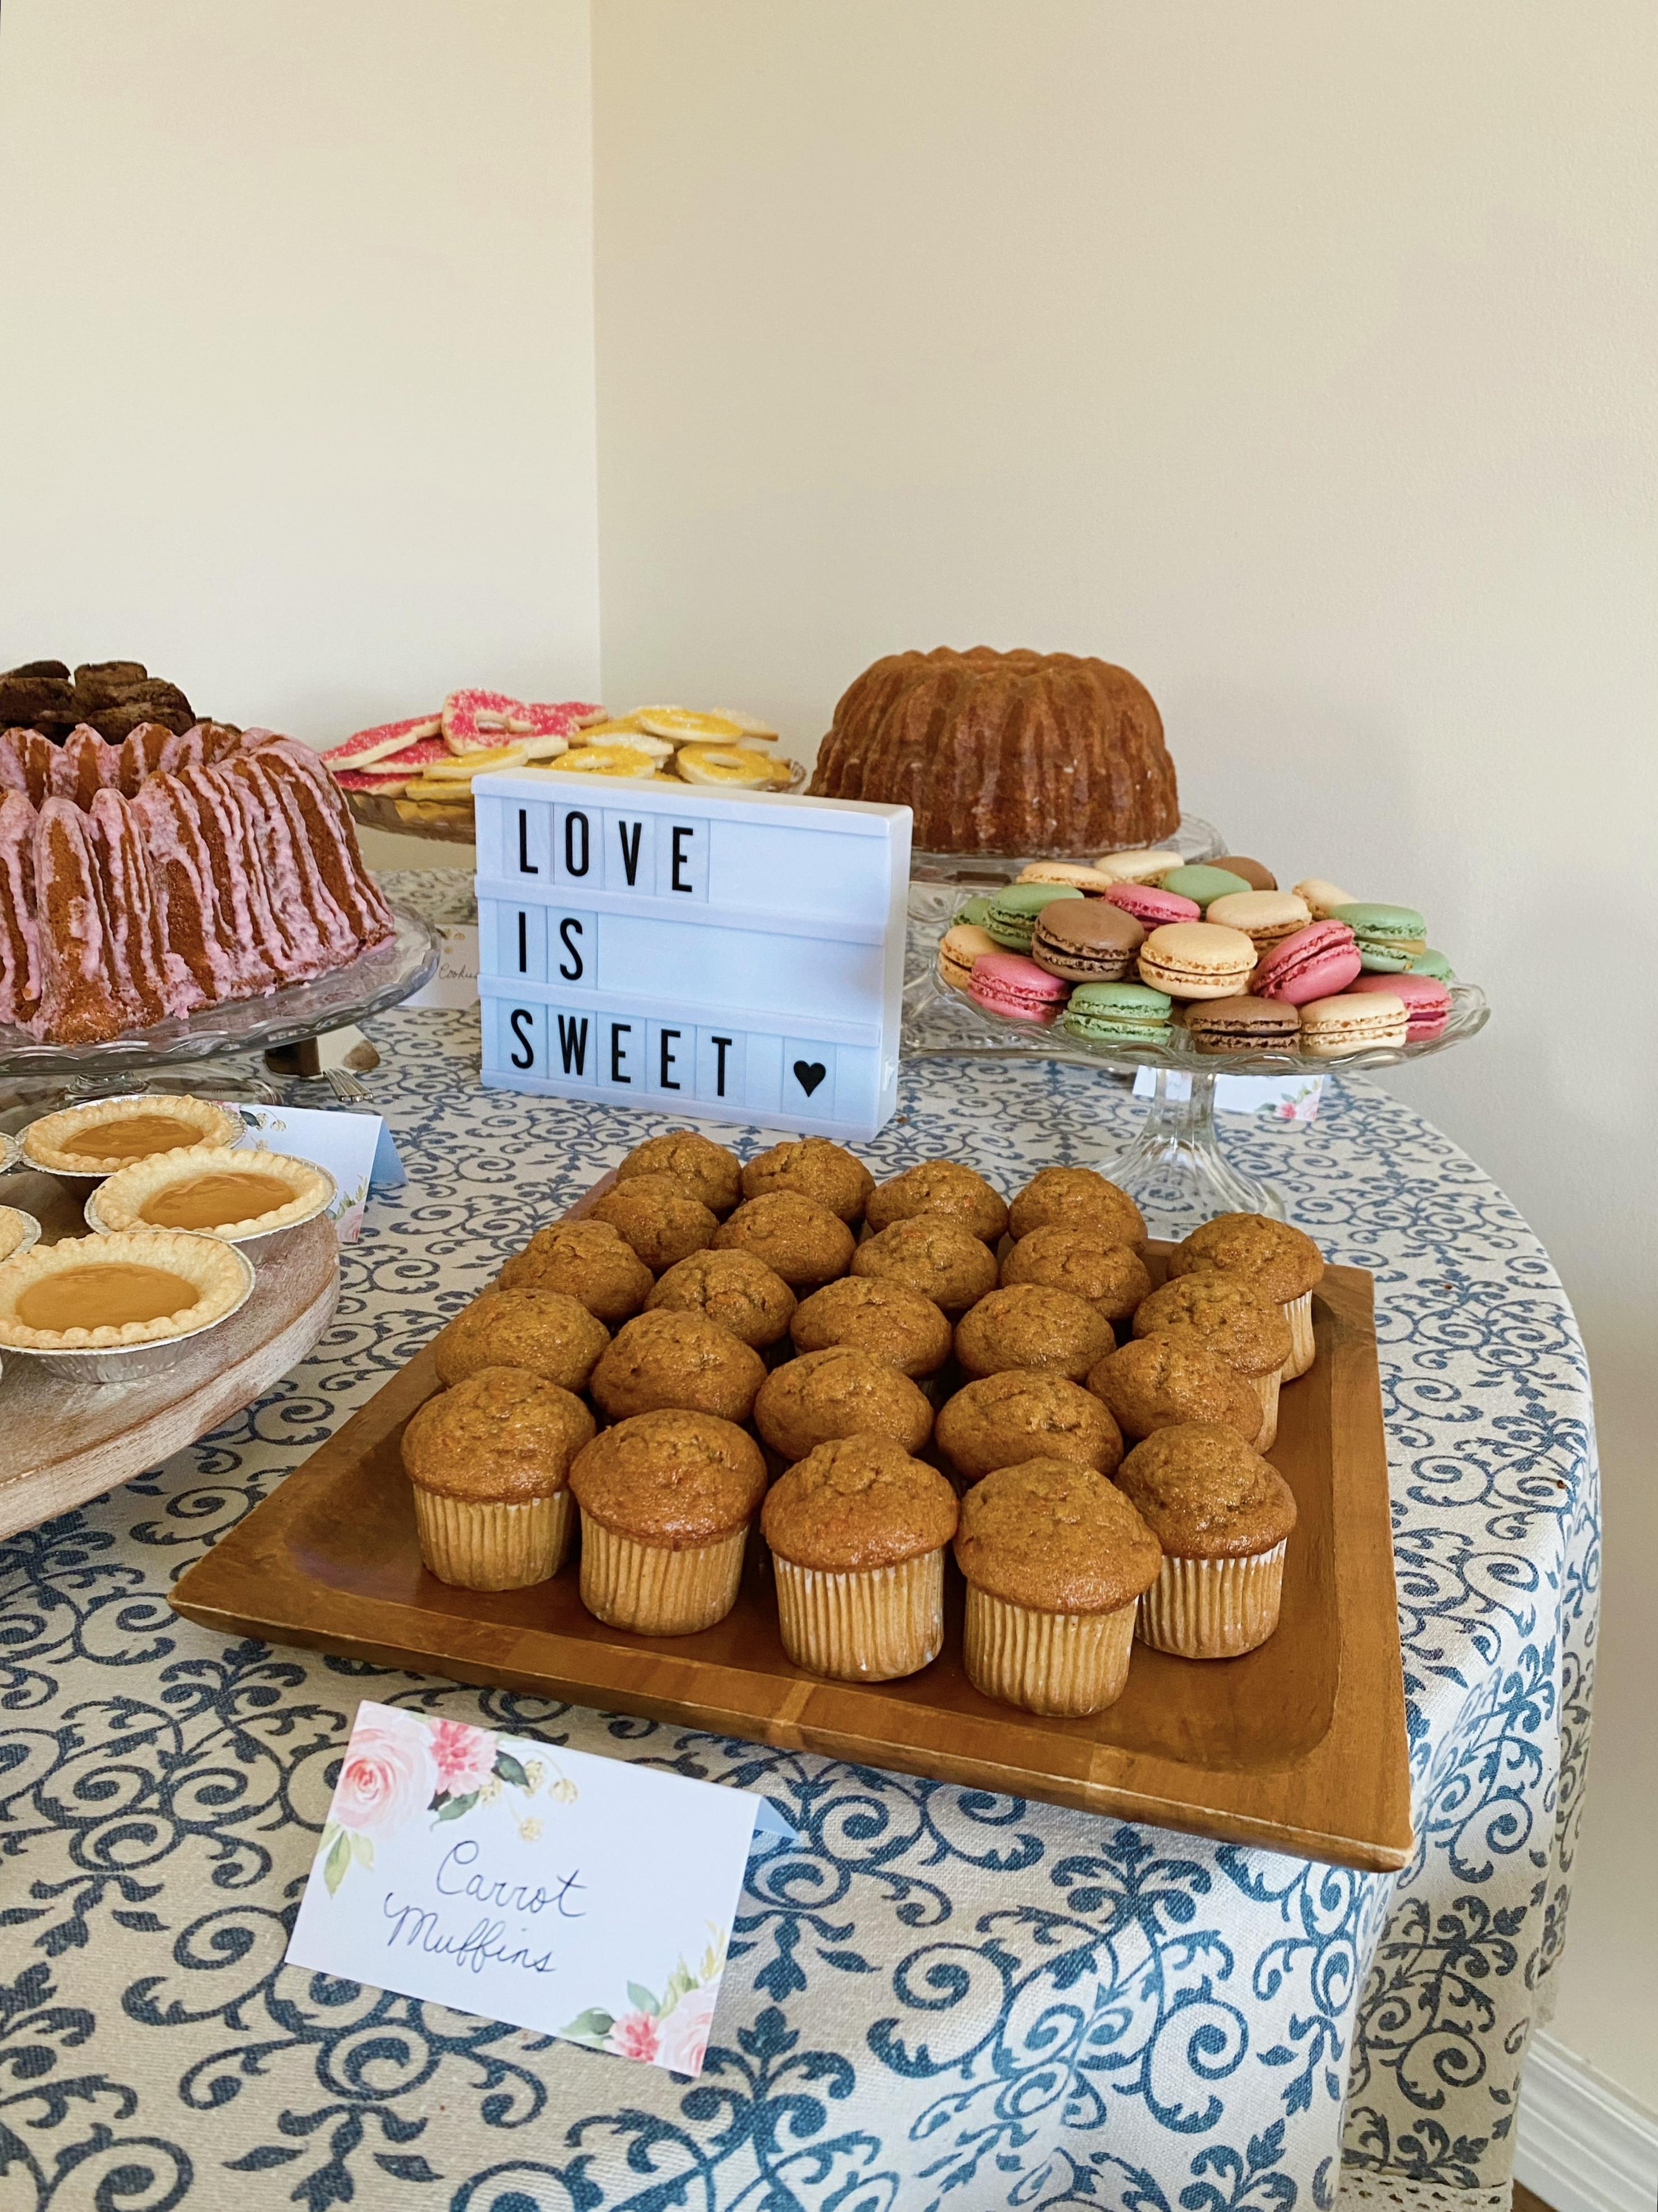
I bought these place cards from Amazon and used them to label each dish. This is super helpful when serving large crowds, as your guests won’t have to hunt you down if they have a question about a particular dish. It’s also a great way to cater to guests with dietary restrictions or allergies, as they can easily see what they can or can’t eat.
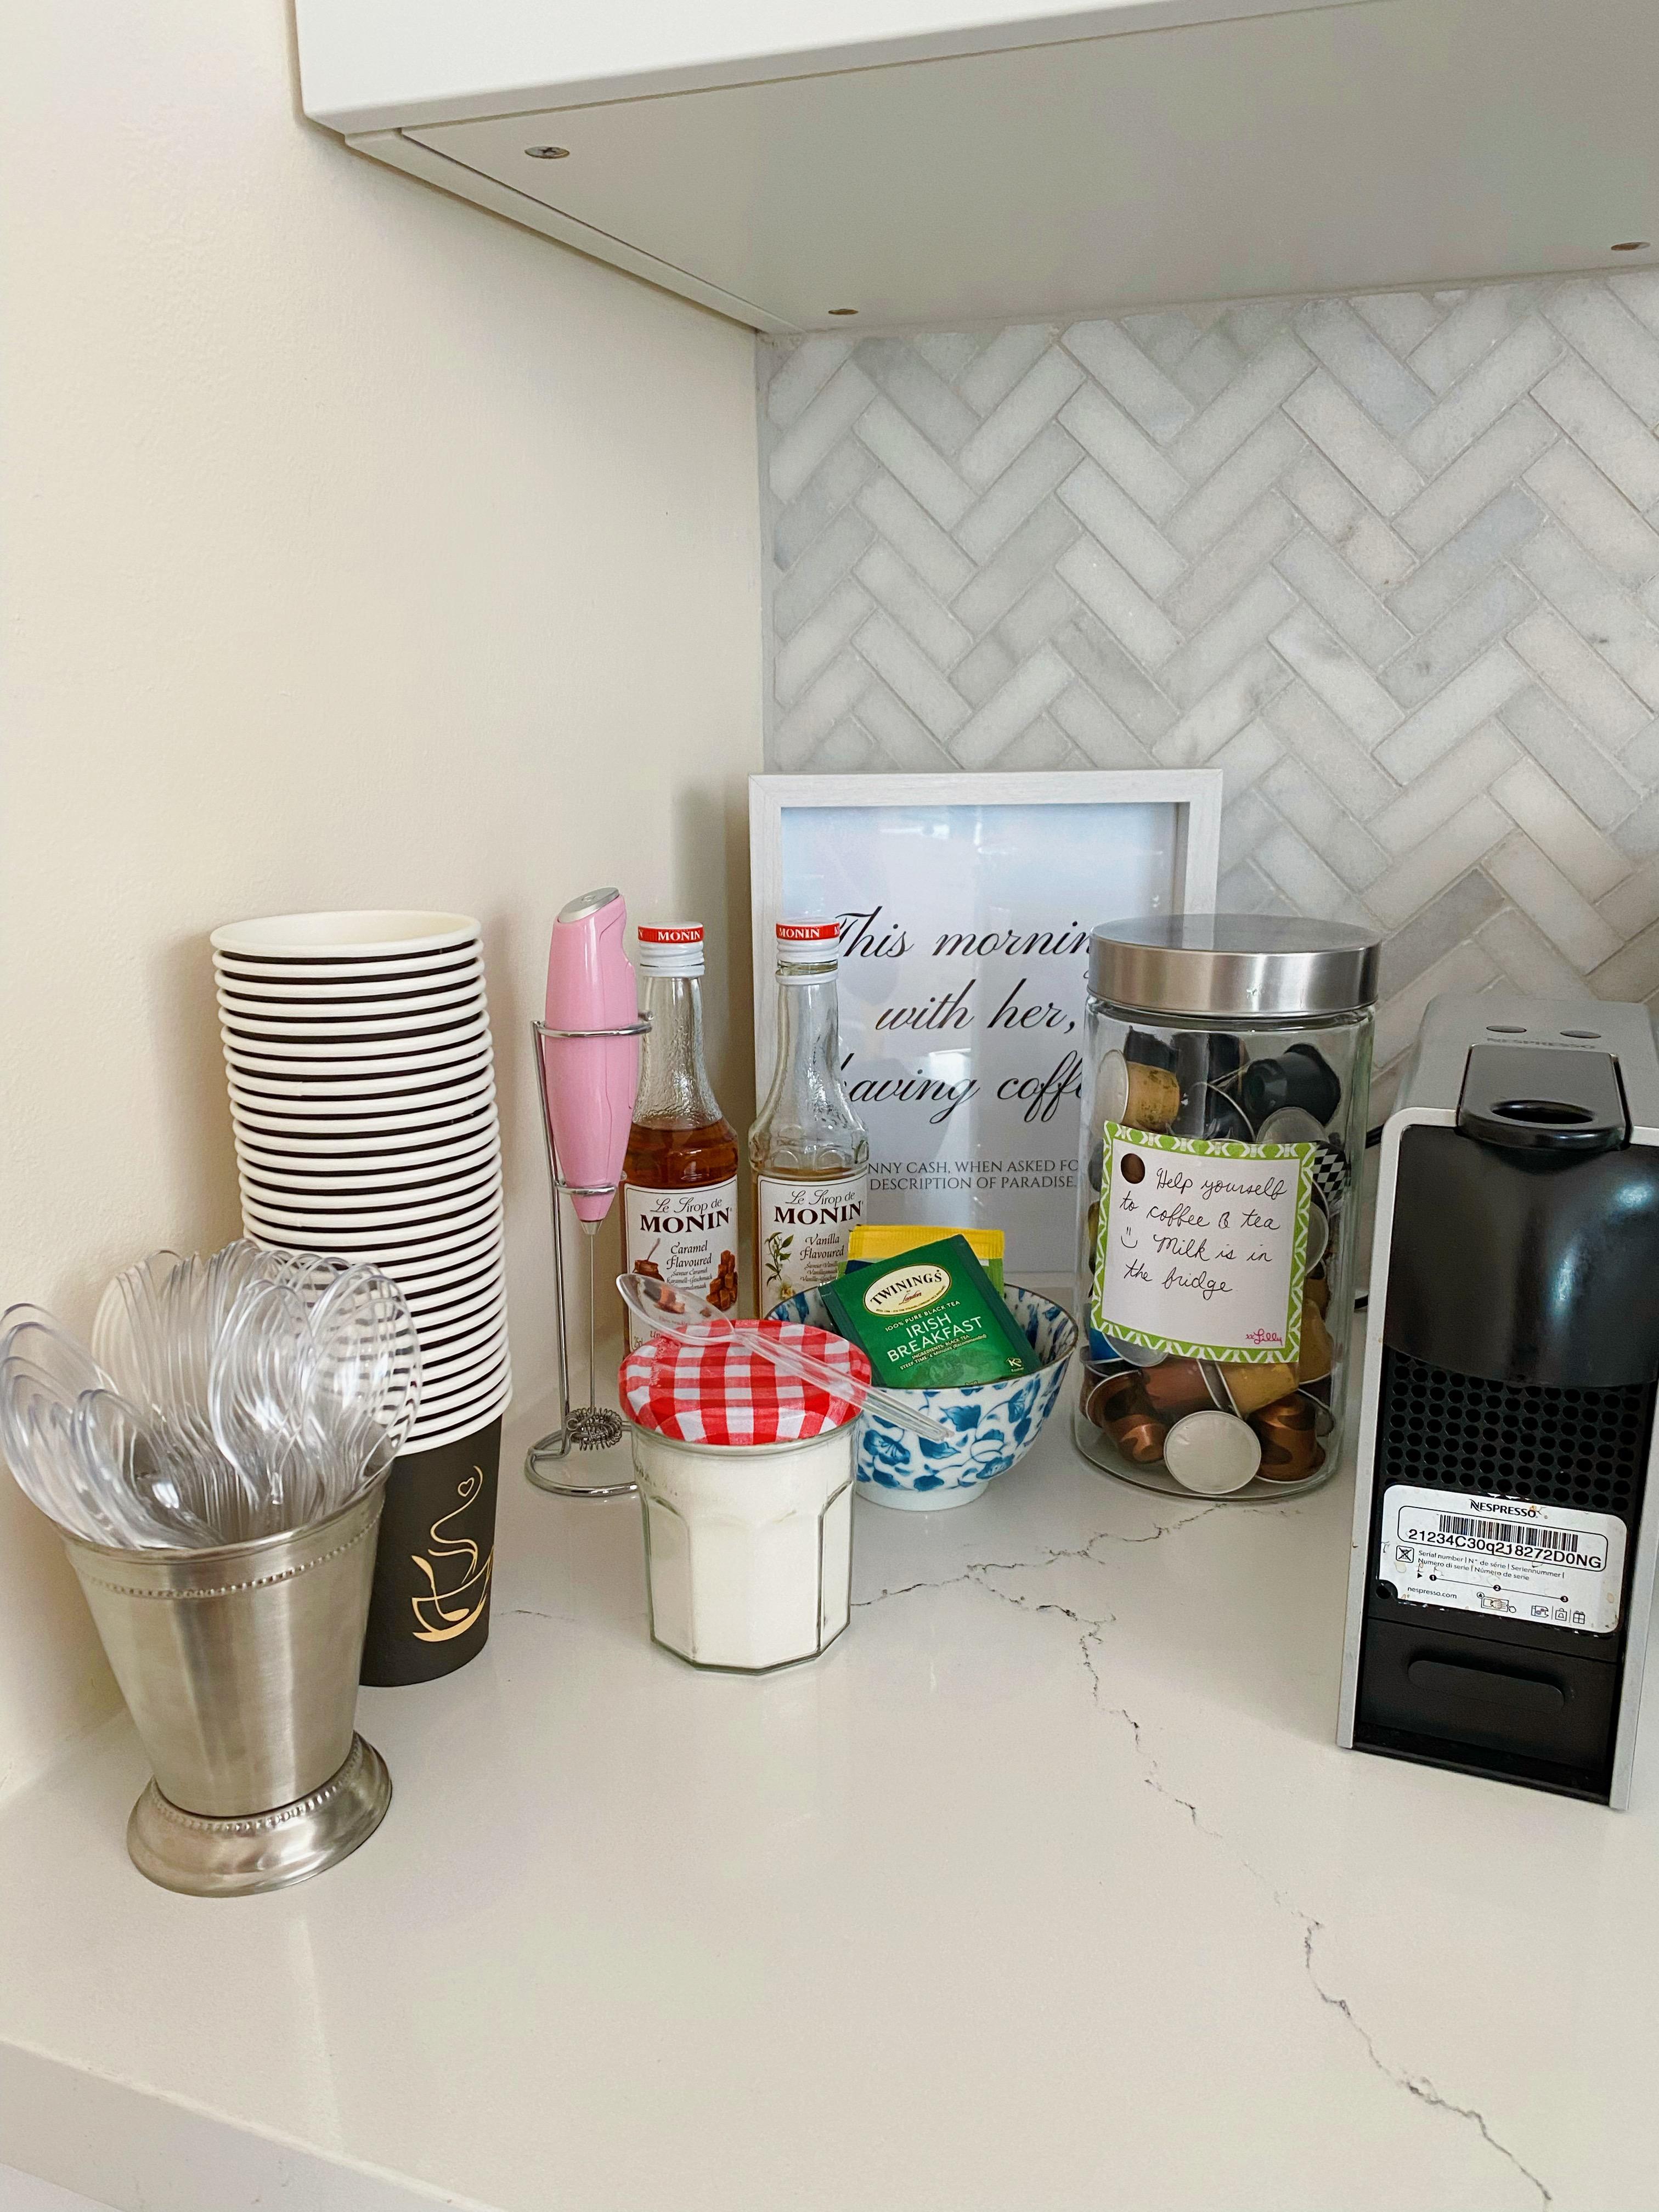
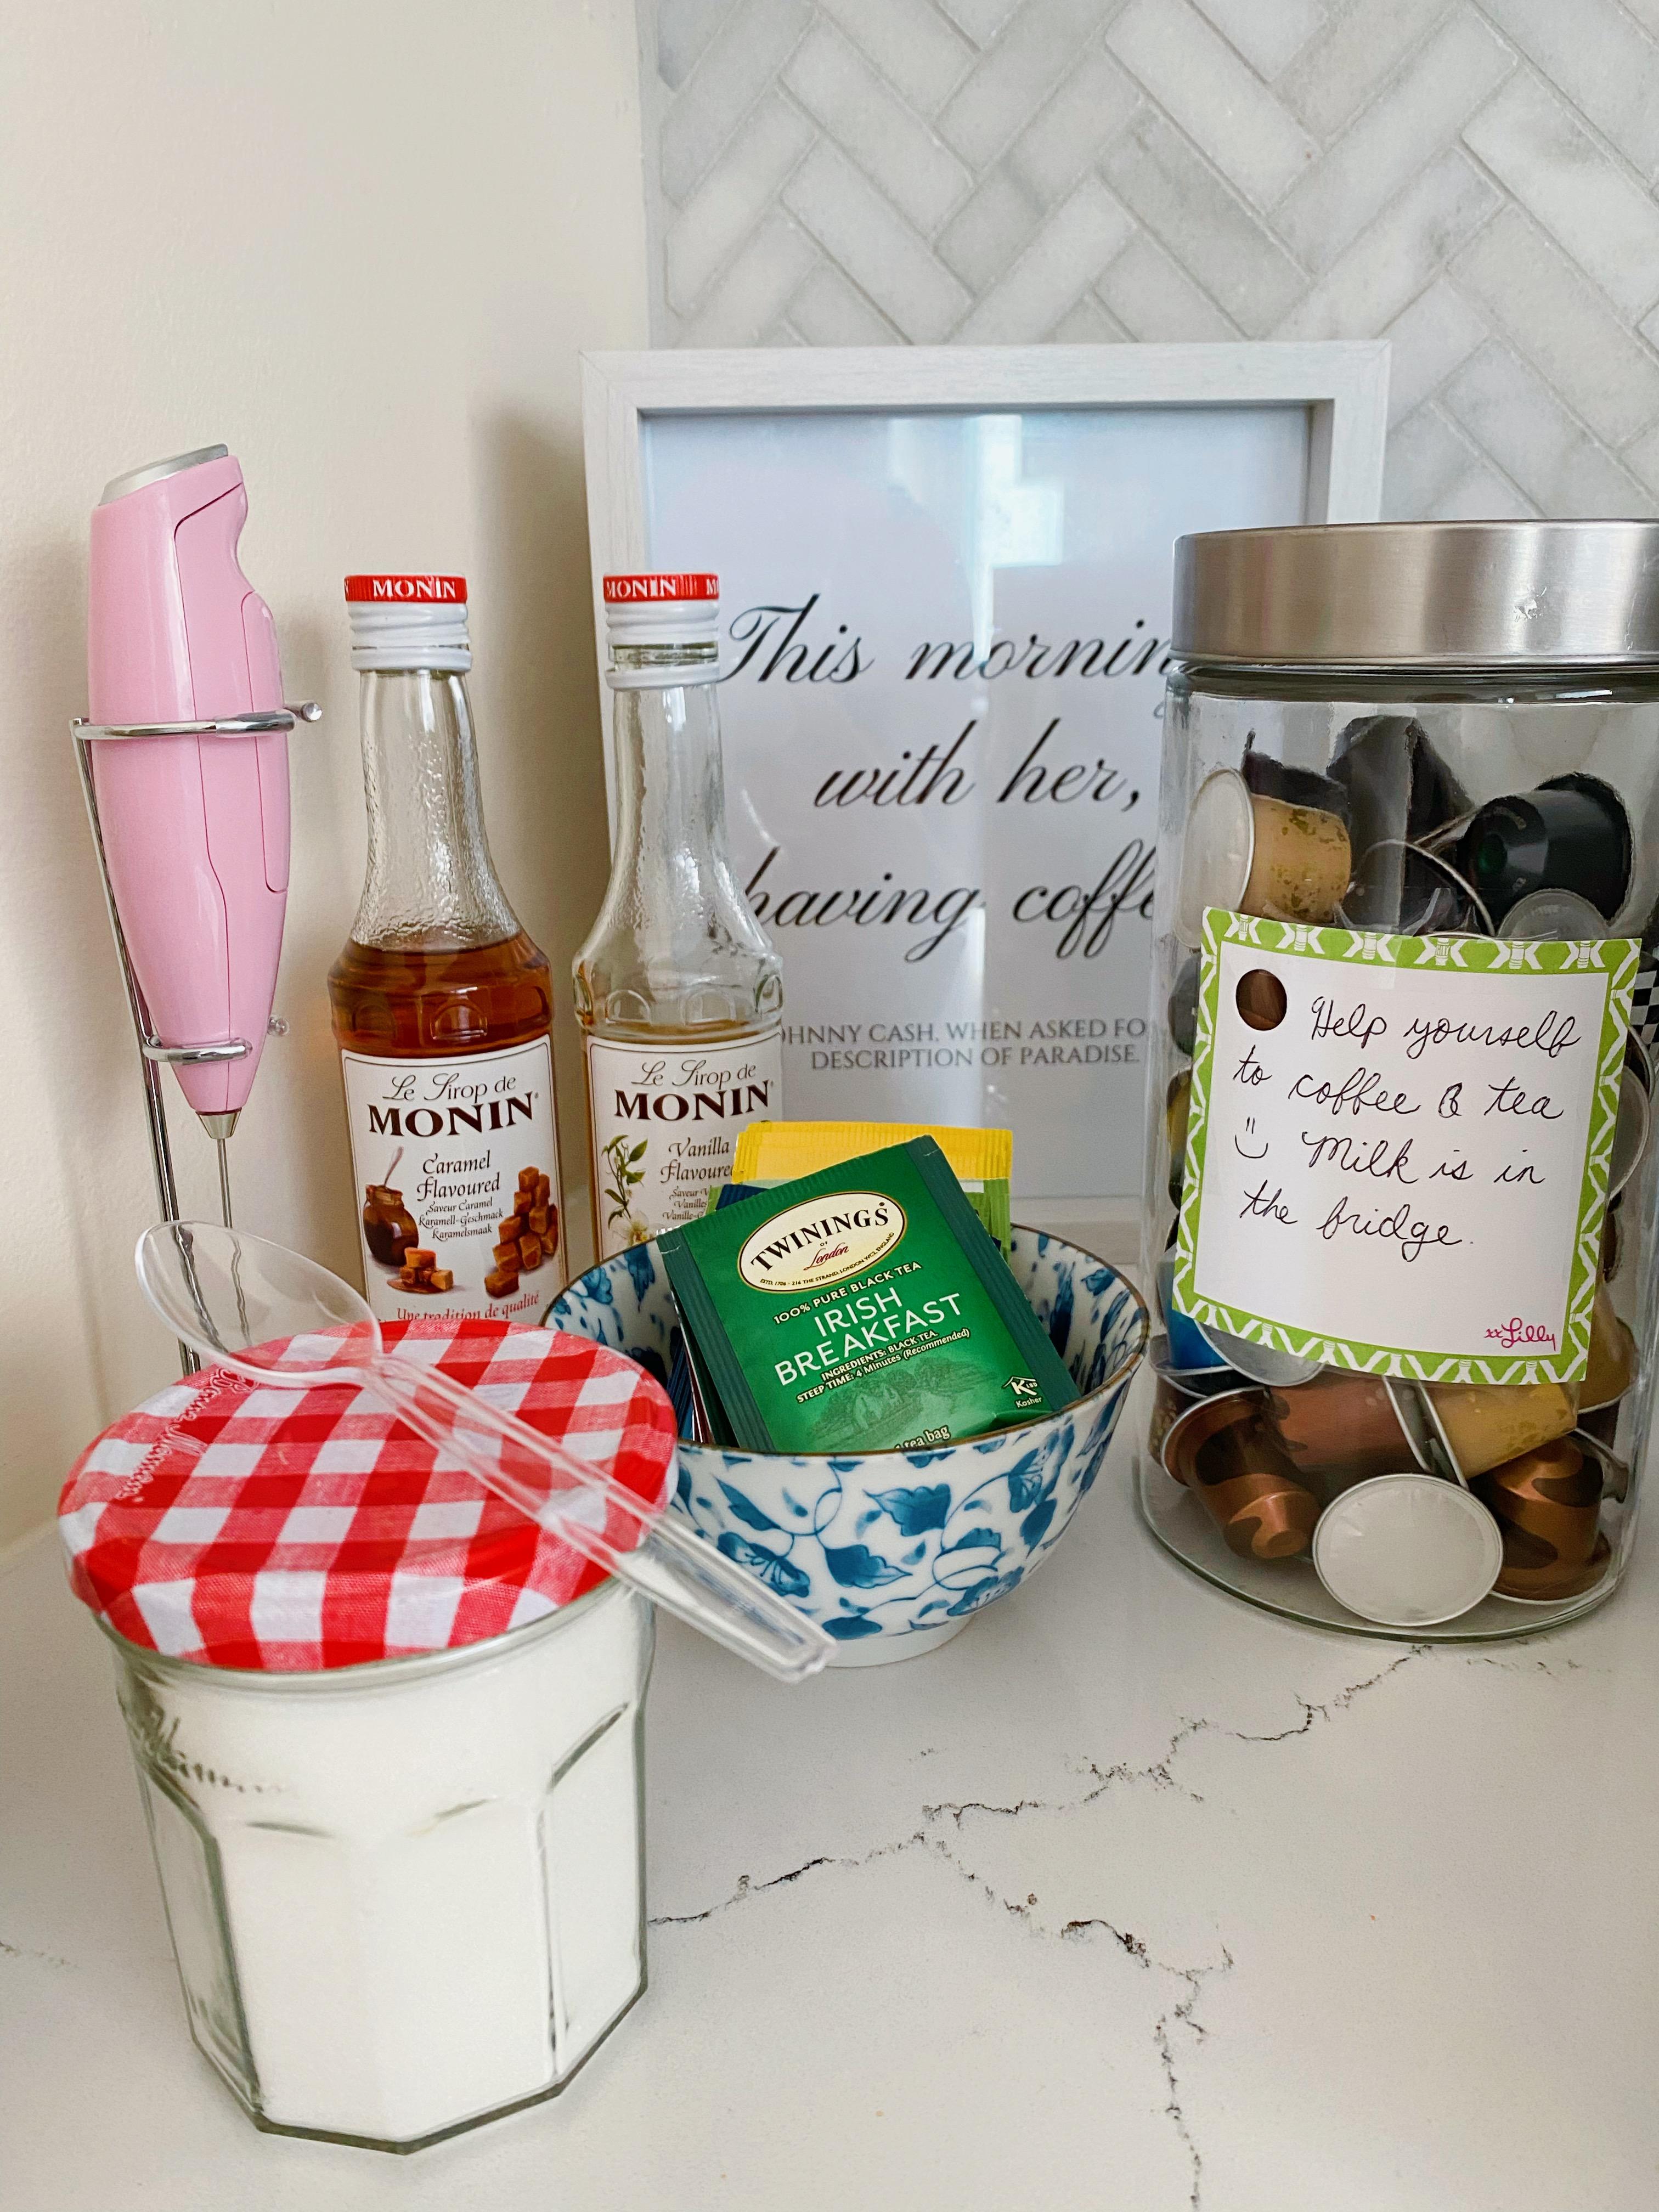
Our kitchen was the food prep hub, so guests didn’t spend too much time there, but I did set up a little coffee and tea station on the counter.
As you can see, we didn’t get any of the food catered – we did it all ourselves (okay, with a lot of help from our generous and talented moms!) Whichever way you slice it, feeding a crowd this size takes a lot of work and planning, and can feel overwhelming if you haven’t done it before – it certainly did for me! But fear not: I learned a lot along the way, and I’m not one to gatekeep. So as promised, here are my best tips for hosting a crowd:
Kiss the menu. Not literally! I mean K.I.S.S. it: Keep It Simple, Stupid! Variety is the spice of life, but this is not the time to be making ten different salads or twelve different casseroles. Focus on a few basic dishes that can be made in large batches. I recommend sticking with items that are relatively simple, easy to prepare, and general crowd-pleasers. Stay away from polarizing ingredients: you may love black olives and cilantro, but chances are many of your guests may not. And don’t fuss with fancy recipes, especially ones you haven’t tried before. If we’re having a couple of friends over for dinner, that’s when I’ll pull out my recipe for mini key lime cheesecakes or German chocolate cake with homemade coconut-pecan frosting. When we’re hosting 100 people? You better believe I’m pulling out the cake mix!
Stick to foods that can be served at room temperature. Of course there will be some exceptions, but if you’re serving buffet-style (and if you’re hosting a crowd, you absolutely should be) try to avoid foods that must be kept extra hot or cold. Your oven and fridge space is precious, and it’s one less thing to worry about. We only had two dishes that needed to be kept warm – the perogies and meat kabobs – and we used chafing dishes for those. Everything else was fine at room temp.
Make your guests do the work. No, I don’t mean putting them on dish duty! But you can majorly reduce time spent food prepping – and cater to more taste preferences – by letting guests DIY a little. Instead of making five different salads, have one basic green salad, and provide different dressings and toppings so guests can customize their own. Instead of spending hours making individual mini sandwiches, put out a big bowl of dinner rolls, and let people make their own sandwiches with the cheeses and meats from the charcuterie board.
Stock your fridge and pantry with pre-prepped food for easy replenishing. Unless you have a giant dining table, you’re probably going to be restocking the buffet several times throughout the party. Prep everything the day before – wash the fruit, cut up the veggie sticks, cube the cheese – and store them in clearly labelled containers so that replenishing is quick and easy. You want to enjoy your party, and not be stuck in the kitchen making salami roses instead of socializing! On that note: consider fridge space. We ended up turning down our deep freezer’s temperature and using it as a second fridge during the party. We also deep-cleaned our fridge the week before to make as much room as possible. I recommend pulling out everything that doesn’t have to be stored in the fridge – e.g. soda cans – and moving them elsewhere for the duration of the party. If you’re low on fridge space, you could also consider coolers! Just fill them with tons of ice and keep them somewhere that’s already cool (e.g. your basement.)
Bake and freeze as much as you can in advance. I baked 4 bundt cakes, 5 loaf cakes, 6 batches of brownies, 90 mini tarts and 70 cookies for this party… not exactly an afternoon baking project! Two months prior, I started baking and freezing desserts. If you’re scared of the freezer, don’t be! The majority of baked goods freeze exceptionally well, and they tasted so fresh and delicious on party day that you’d never know they’d been frozen. The key to successful freezing is all in the storage. Let the cake (for example) cool completely, wrap it tightly in 2 layers of plastic wrap, then wrap it in an outer layer of aluminum foil, then put it in a Ziploc freezer bag (for cakes, you’ll need the extra large bags.) The plastic wrap-foil-freezer bag combo prevents the food from drying out or getting freezer burn. To avoid your cakes getting squished or crumbling when you wrap them, I recommend flash freezing them first: just place them uncovered in the freezer for a few hours until they’re frozen solid, and then store using the above instructions.
Use lists to keep yourself organized. We started planning 4 months ahead of time, and had a detailed to-do list with everything that needed to be done in the months, weeks and days leading up to the party. We checked the list regularly to ensure we were staying on track. We also had a menu spreadsheet where we kept track of every possible food-related detail. It listed each dish we were serving along with…
- The quantity needed. E.g. how many mini muffins, or how many trays of salad? There are some handy calculators online that can help you estimate how much you’ll need… though we still ended up with lots of food left over (hey, it’s better than having too little!)
- The ingredients needed. If you know everything you’re baking in advance, you can make things a lot easier by consolidating your shopping list and making one trip. We also spelled out everything we needed for things like, say, a charcuterie board: which types of cheeses and cold cuts, how many of each, etc. When hosting a smaller group, it’s easy to go to the store the day before and just pick up whatever looks good. But when you’re dealing with large quantities and multiple dishes, I find – at least for my own easily-frazzled brain – it really helps to have everything spelled out and idiot-proofed. Otherwise I’d totally be that person who forgets to buy crackers for a charcuterie board!
- Any special bakeware needed. For instance, I got these adorable cookie cutters for the ring-shaped sugar cookies. And if you’re going to be baking multiple things at once, consider investing in multiples of things like baking pans and cookie trays, so that you can pull one thing out of the oven and pop in the next, zero wait time required.
- A link to the recipe. There’s nothing worse than being ready to bake or cook something, and realizing you can’t remember what Pinterest board that recipe was saved to…
- The source. E.g. are you baking and freezing it ahead of time? Buying it from the grocery store the day before? Ordering it from a bakery? If someone is bringing a dish, make sure you coordinate dropoff times accordingly to ensure a smooth setup.
- Any serveware/utensils needed. This is an easy one to overlook, but never assume that you have enough serving platters/utensils! I pulled out every platter we had a month before the party, and planned what food would be served on what dish. This gives you enough time to buy or borrow anything you don’t already have.
Don’t be afraid to buy pre-made food if it’s cheaper or more convenient. While my preference is always homemade – and the majority of the food we served was – sometimes you have to weigh whether it’s worth the time and effort. And homemade isn’t always cheaper: sometimes, by the time you buy the ingredients, you’ll end up spending more than if you’d had just bought pre-made! Tania initially planned on making her own dips and salad dressings, but it turned out buying the bottled kind was way more time and cost-effective. And I’d initially planned on making my own mini-muffins, until I realized that buying the ingredients (even using a mix) would have cost me just as much as buying them from the grocery store bakery!
Start planning early, and prep as much in advance as possible. This is where those checklists will come in handy! I find that breaking big projects into manageable, bite-sized chunks is the best way to avoid overwhelm. However you slice it, the days leading up to the party are going to be busy, as there’s only so much you can realistically do in advance. Even though Tania and I did so much ahead of time, the day before the party was honestly crazy. We both took the day off work and worked nonstop from 7am-midnight preparing food, cleaning the house, moving furniture, setting up tables and tents, decorating, etc. It made me especially grateful that I’d taken care of little tasks – such as writing out food labels, ironing the tablecloths, or pre-scheduling the reminder email to guests – weeks before. Those tasks may seem small, but they’ll really add up when you’re already pressed for time!
Start shopping early for the best savings. If you make your shopping list early enough and start watching the flyers, you can save a ton of money on things like party supplies and non-perishable food items. If you have a Costco membership, they’re great for things like water bottles, soda cans, charcuterie party packs, huge wheels of Brie…etc. Liquidation warehouses are a great resource for deals on disposable cups, plates and cutlery, as is Facebook Marketplace. (Think of all the people who bought too much for their own parties!)
Ask for help. Whether it comes to borrowing tables and chairs or assisting with food prep, we wouldn’t have been able to pull this off without some serious help from our families. Tania’s mom made the perogies and meat kabobs, my mom made the salad and pasta salad, and we sourced most of the furniture from Tania’s relatives. I’m not a huge fan of potlucks for large groups (I find it gets chaotic and is too tough to coordinate) but if you have a select few relatives or friends who can pitch in by bringing a dish, it makes all the difference. We’re very lucky to have had the help that we did – it really does take a village! Something else we found super helpful: ask a couple of guests (ones you’re close to, of course!) to be your “right hand” on party day and help with greeting guests, tidying up, replenishing food, making any last-minute ice/food/drink runs, etc. In Tania’s and my case, those were our respective maids-of-honour, Caitlin and Victoria. We couldn’t have done it without them!
Send invites via Paperless Post. Paper invitations are lovely, but an online system is so much more convenient. I love Paperless Post because you can easily track who has RSVP’d, and it lets you send email communications with one click. You can use their messaging system to nudge people who haven’t yet RSVP’d, or send a reminder email to all guests the day before the party with directions, parking info, etc. Paperless Post has so many cute designs and many of them are free to send! We didn’t spend a cent on ours.

Answer guests’ questions before they ask. As a host, you’ll be greeting guests, introducing people to one another, and generally ensuring everyone is having a good time – not to mention replenishing food and tidying up throughout the party – so it’s impossible to be everywhere at once. We tried to make things as easy and self-serve for guests as possible. We made sure the bar areas and coolers were fully stocked at all times, and had things like ice and bottle openers readily available so nobody had to ask for them. We wrote down the names of each dish, along with notes about ingredients (e.g. if it contained meat, nuts, etc.) on place cards, so that people knew what they could or couldn’t eat. We wrote little notes to encourage people to help themselves – e.g. at our coffee station. The more you can anticipate your guests’ needs, the happier they’ll be – and in turn, the more relaxed you’ll be!
Finally… let go of perfection. As a diehard perfectionist, this is the hardest one for me – but arguably the most important! Despite how much you plan and prepare, inevitably something will go wrong, and unless you’re Martha Stewart, there’s no way every detail will be absolutely perfect. (And hey… I’m sure even Martha’s had a wrinkled tablecloth at some point!) Your guests aren’t expecting perfection, and neither should you. It’s all about learning to relax, enjoy and appreciate what’s important: celebrating a special occasion with your loved ones!
Well, there you have it… my best tips for hosting a crowd in the most organized, budget-friendly and stress-free way possible. If you’re planning a large party of your own, I hope this post has been helpful. If you have any questions, feel free to ask – I’m always happy to help!
Is this list missing anything? If you have your own party-hosting tips to share, please drop them in the comments or send me an email – I’d love to hear your advice!
Leave a Reply